

Previous: Islamic Book Crafts 2019 ; 2020 Kids’ Crafts
28 muslimaat came together to bring you DIY ideas on how to make Arabic letters come to life. Everyone chose one letter from the Arabic alphabet and did a craft related to it. This article is an ongoing series hence we’ll be doing these collaborative crafts every year before Ramadan in shaa Allah. This year the theme is Arabic alphabets and next year, it could be something else, but I hope this annual collaboration with other bloggers and creatives helps you spin your own creative ideas to help your kids engage with the beauty of the Arabic language.
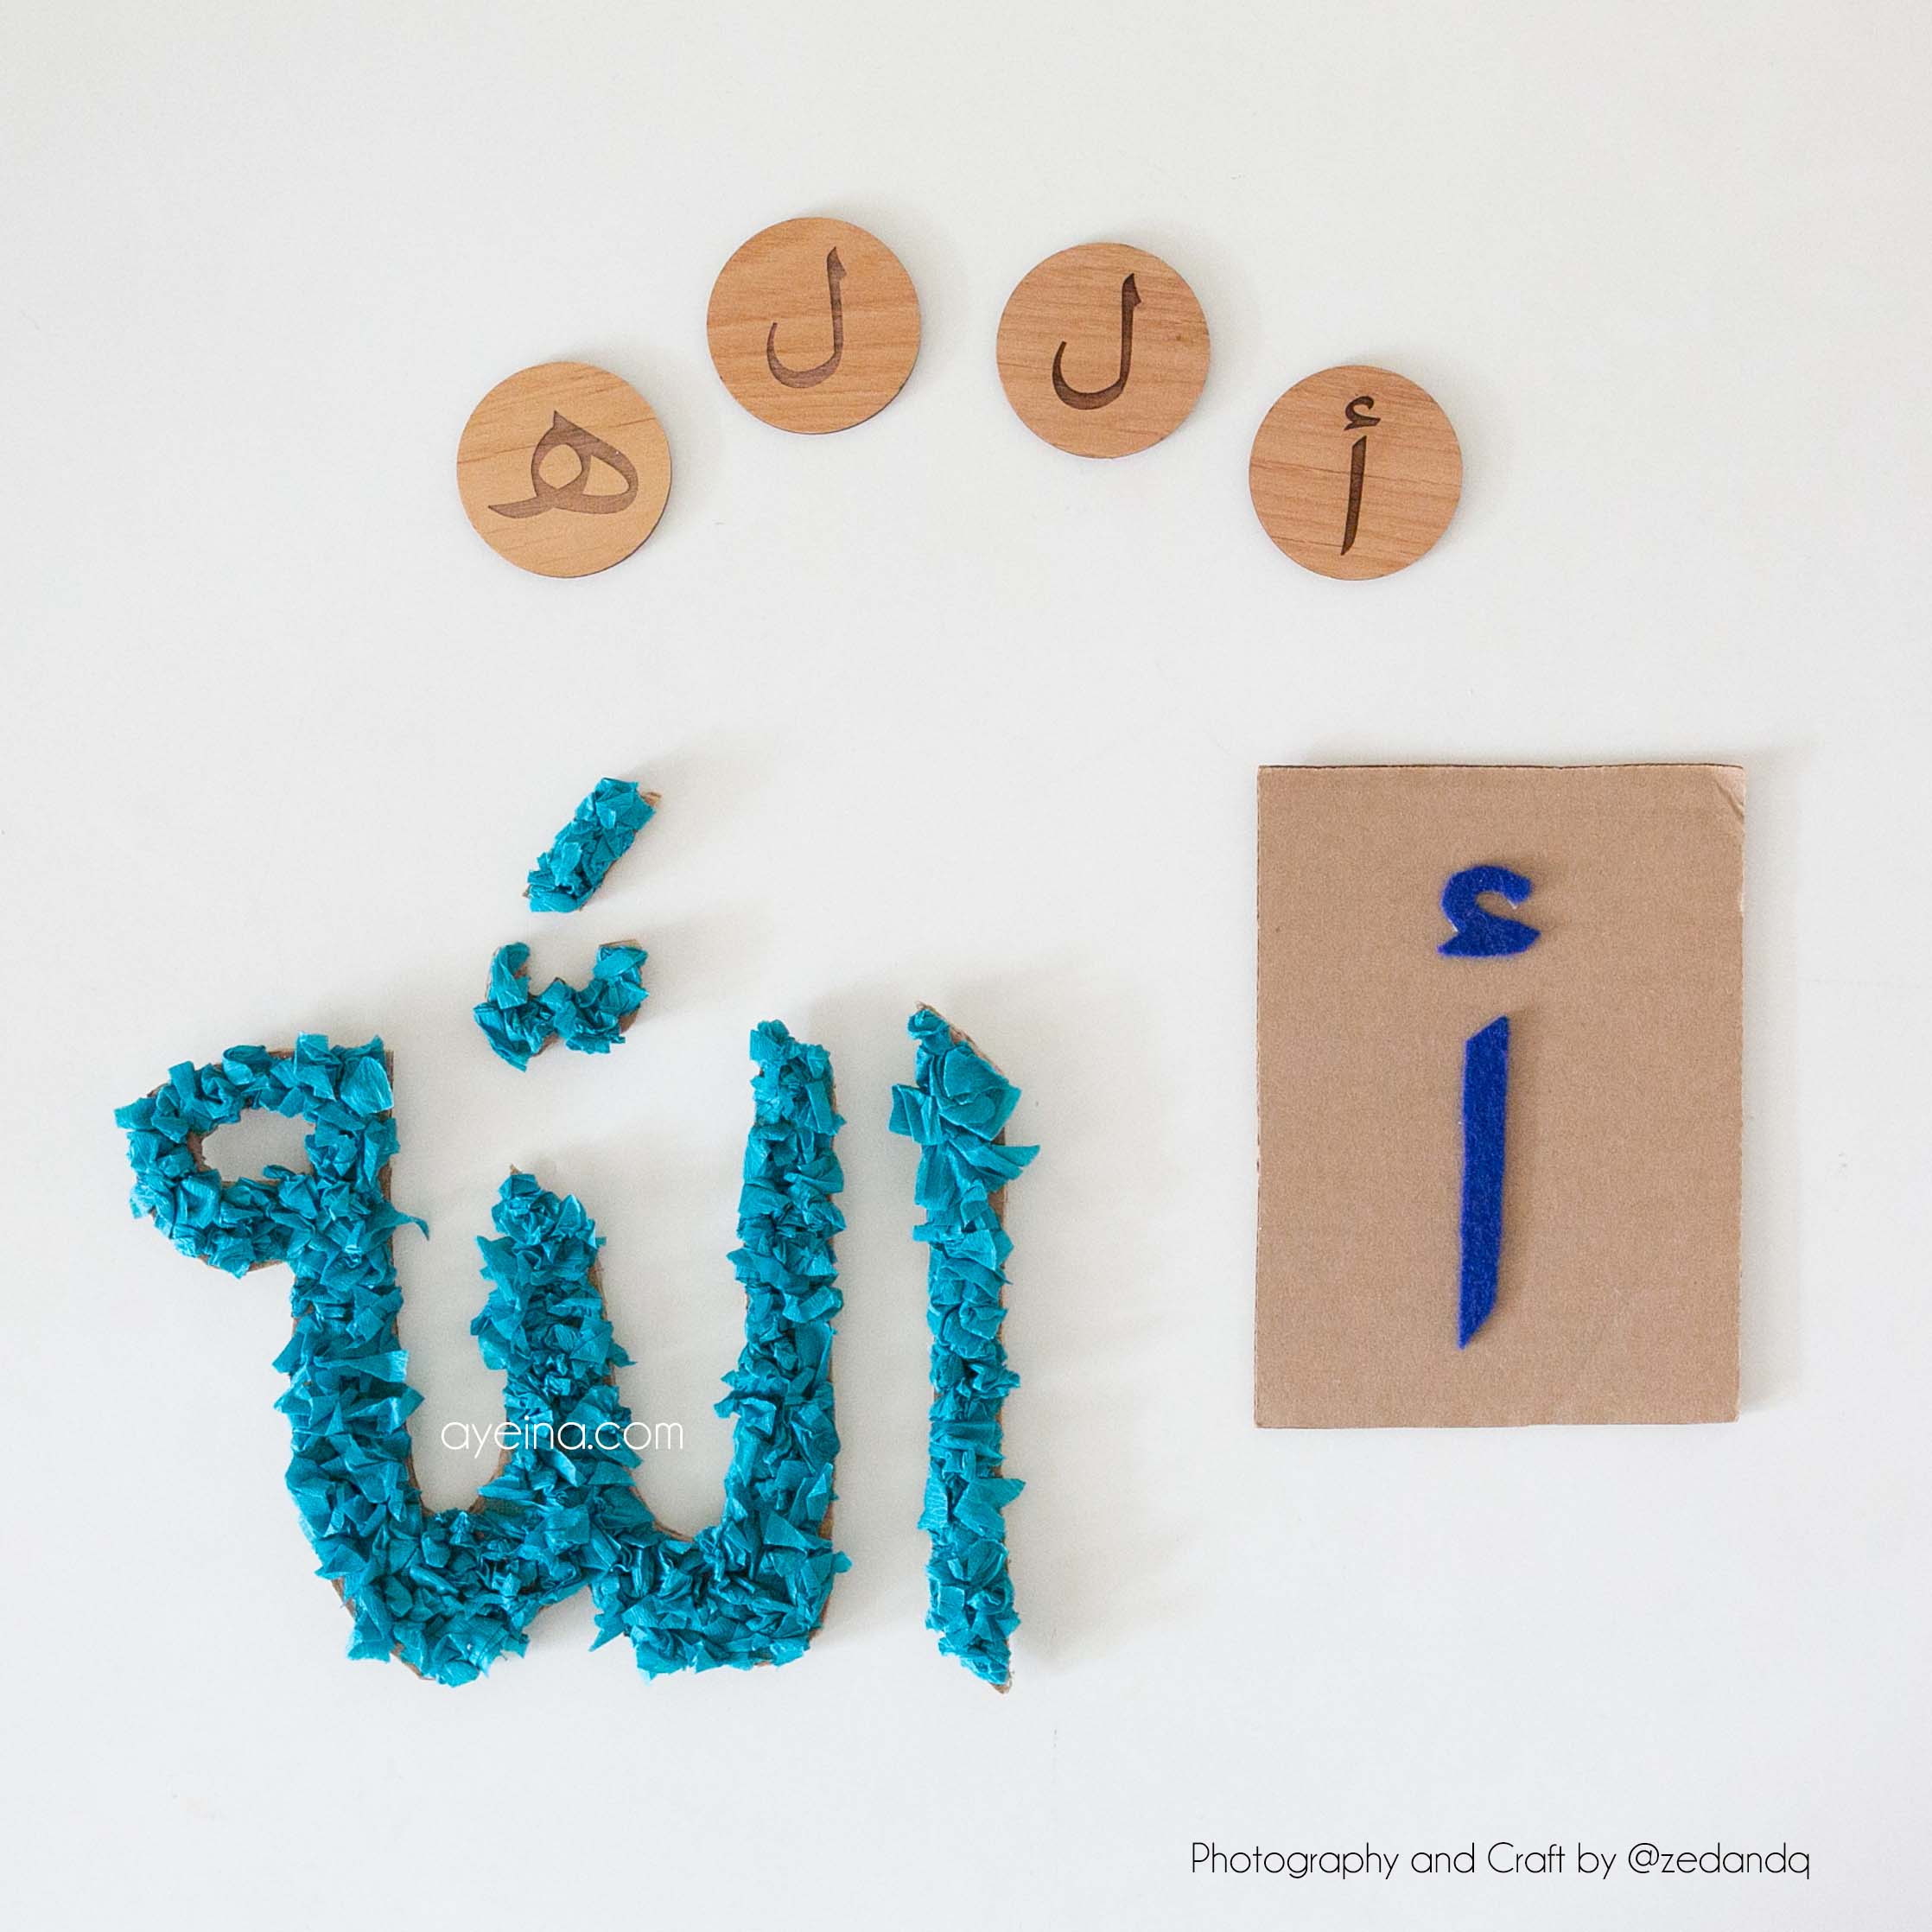
1) Alif (الله = ا – Allah)
@zedandq made a craft for the letter alif.
Materials needed for the craft: Cardboard, Tissue Paper, Scissors and PVA Glue.
What to do: Cut the name from cardboard. On Alif: Scrunch up small pieces of tissue paper (add in the colour of your choice). Glue tissue paper onto the cardboard.
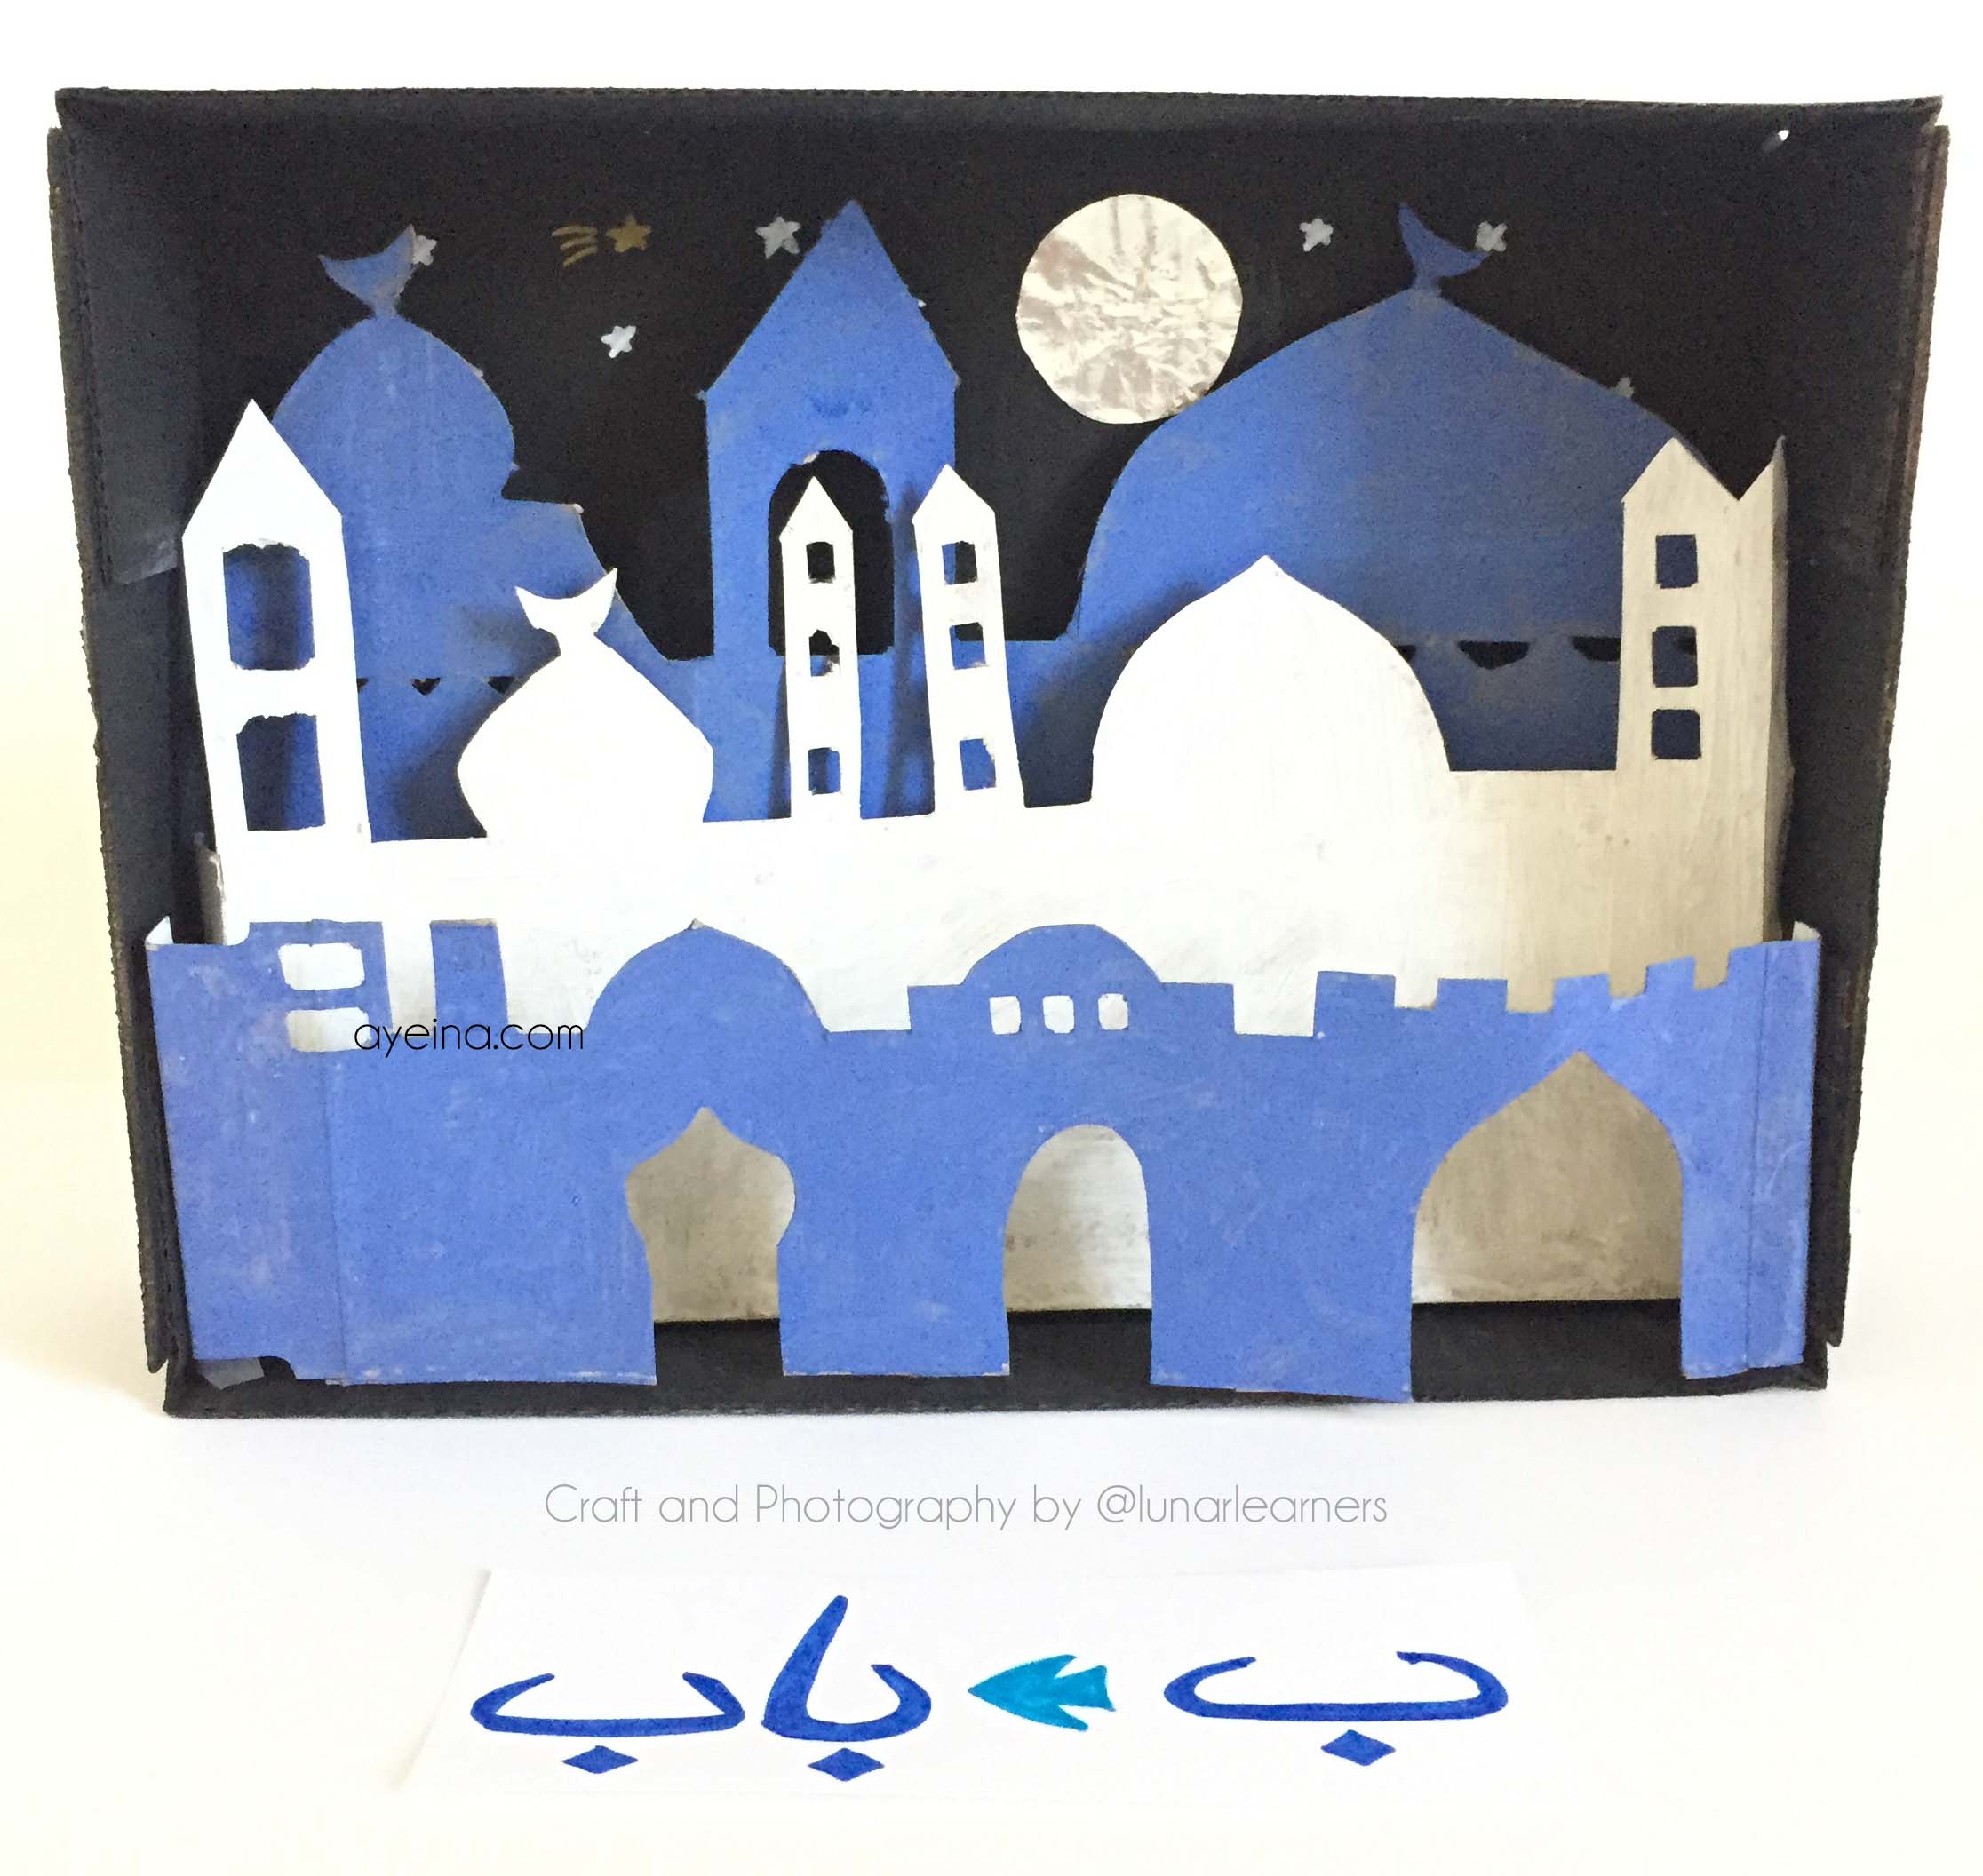
2) Baa (باب = ب – Door)
@lunar_learners made a craft for the letter baa.
Materials needed for the craft: Empty cereal boxes or any other cardboard boxes, Glue/tape, Scissors /x-acto knife, Paint, Foil.
What to do: Cut one of the large panels off one of your boxes. This will form the base of the cityscape. Paint this base black. Open up the second cereal box so it lays flat. Draw 3 different cityscapes, each one slightly shorter than the other. Each cityscape should be the width of your base box plus a little extra on either end which will be used as flaps to attach the scenes to the base box. Paint each of the cityscape scenes. For added effect alternate the color used for each cityscape. Fold over the extra side flap on either side of your cityscapes. Glue/tape these flaps to either side of the base box, starting with the tallest at the back. Cut a circle from foil and glue it on for the moon. Add stars using a marker.
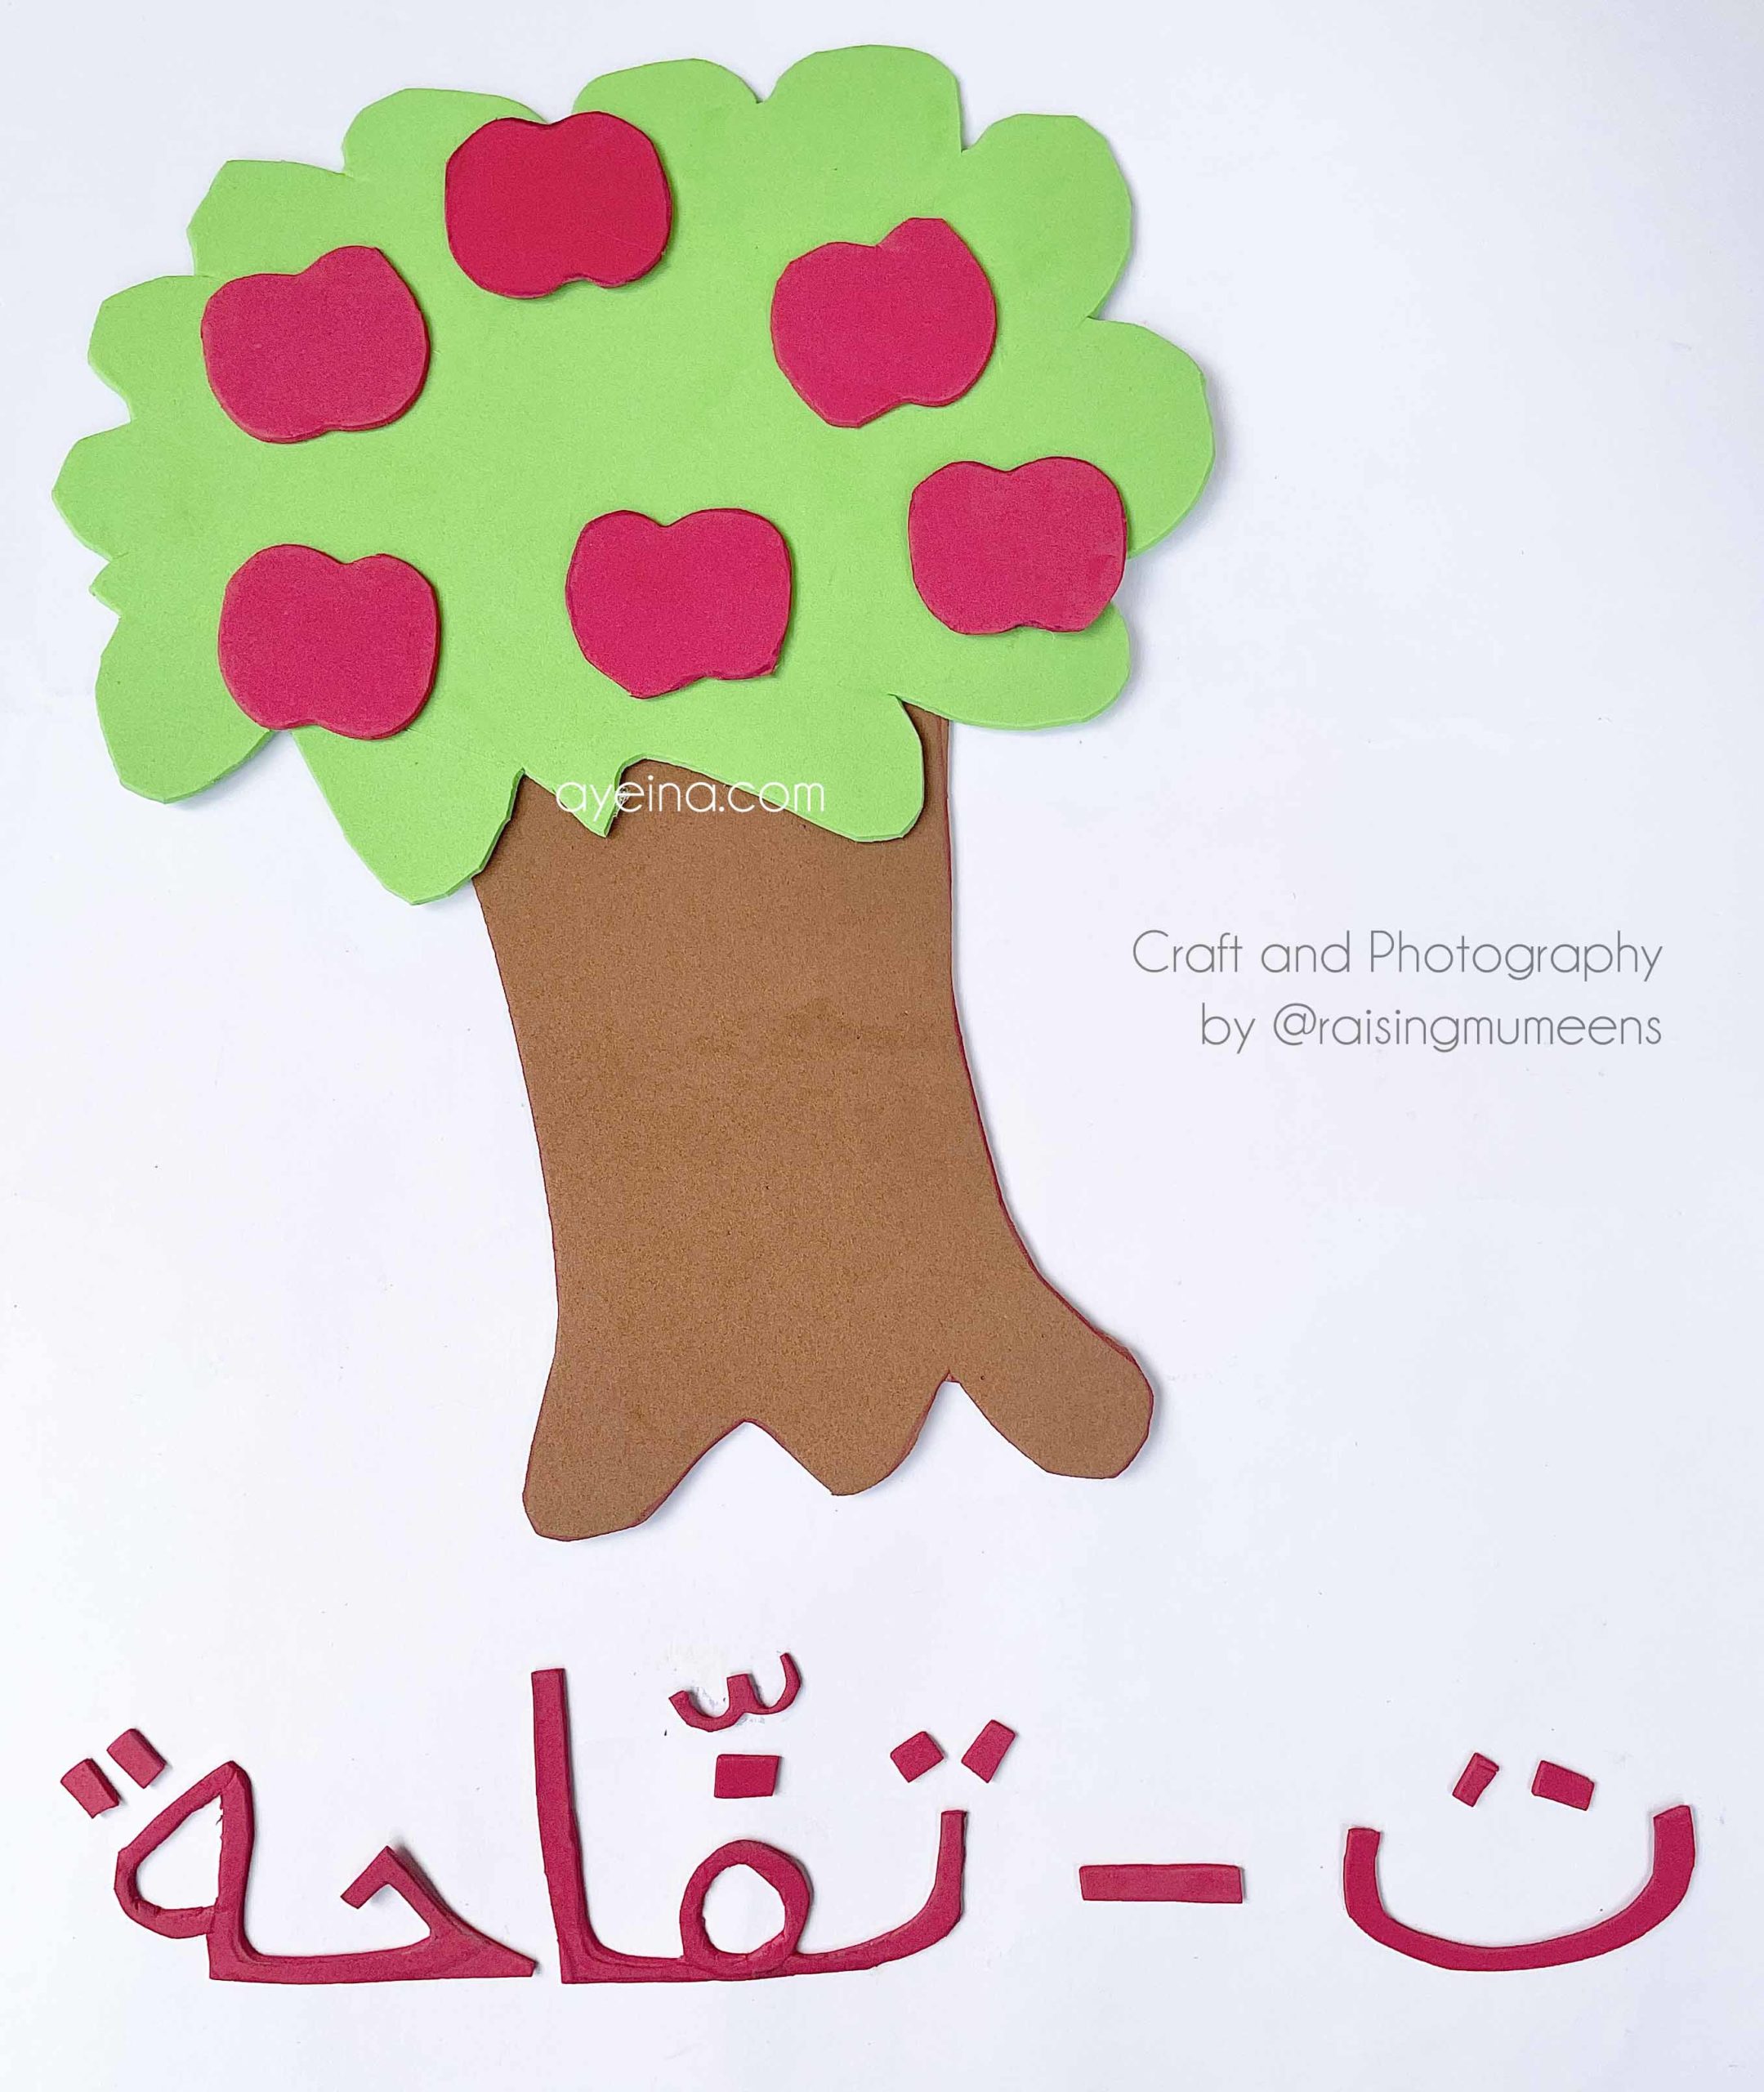
3) Taa (تفاحة = ت – Apple)
@raisingmumeens made a craft for the letter taa.
Materials needed for the craft: PVA craft foam (construction papers are good too), Glue, Scissors.
What to do: Cut out a craft foam/paper in the shape of a tree trunk. Cut out another foam/paper in the shape of the tree leaves/branches. Place the foam shaped as tree branches/leaves on the one shaped like a trunk. Glue together. Cut foam/paper in the shape of apples or any fruits you wish. Glue to the branches/leaves. Cut out the Arabic letters from foam/paper.
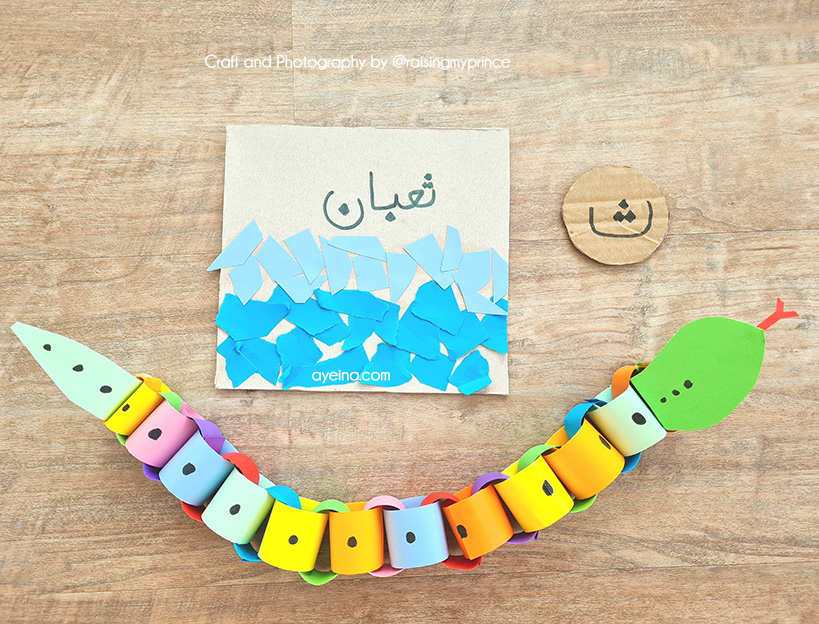
4) Thaa (ثعبان = ث – Snake)
@raisingmyprince made a craft for the letter thaa.
Materials needed for the craft: Different colored cardstock (2 sheets each), Scissors, Markers, Glue.
What to do: To make this chain art snake, choose the card stock colors you want for your snake. 2 sheets of each color would be more than sufficient. Add more card stock if you want a longer snake. Measure 5 cm width and upto 15 cm in length and cut your cardstock. These pieces will make the link of your snake’s body. To make a link, curve the cardstock and glue it together at the end. Do not fold it. Repeat step 3 by inserting the cardstock in the opposite direction of the already made link and glue the ends. Repeat to make the snake’s body. Once you are satisfied with the length, make the snake’s head and tail and attach it to the body appropriately. You can also draw patterns on the snake.
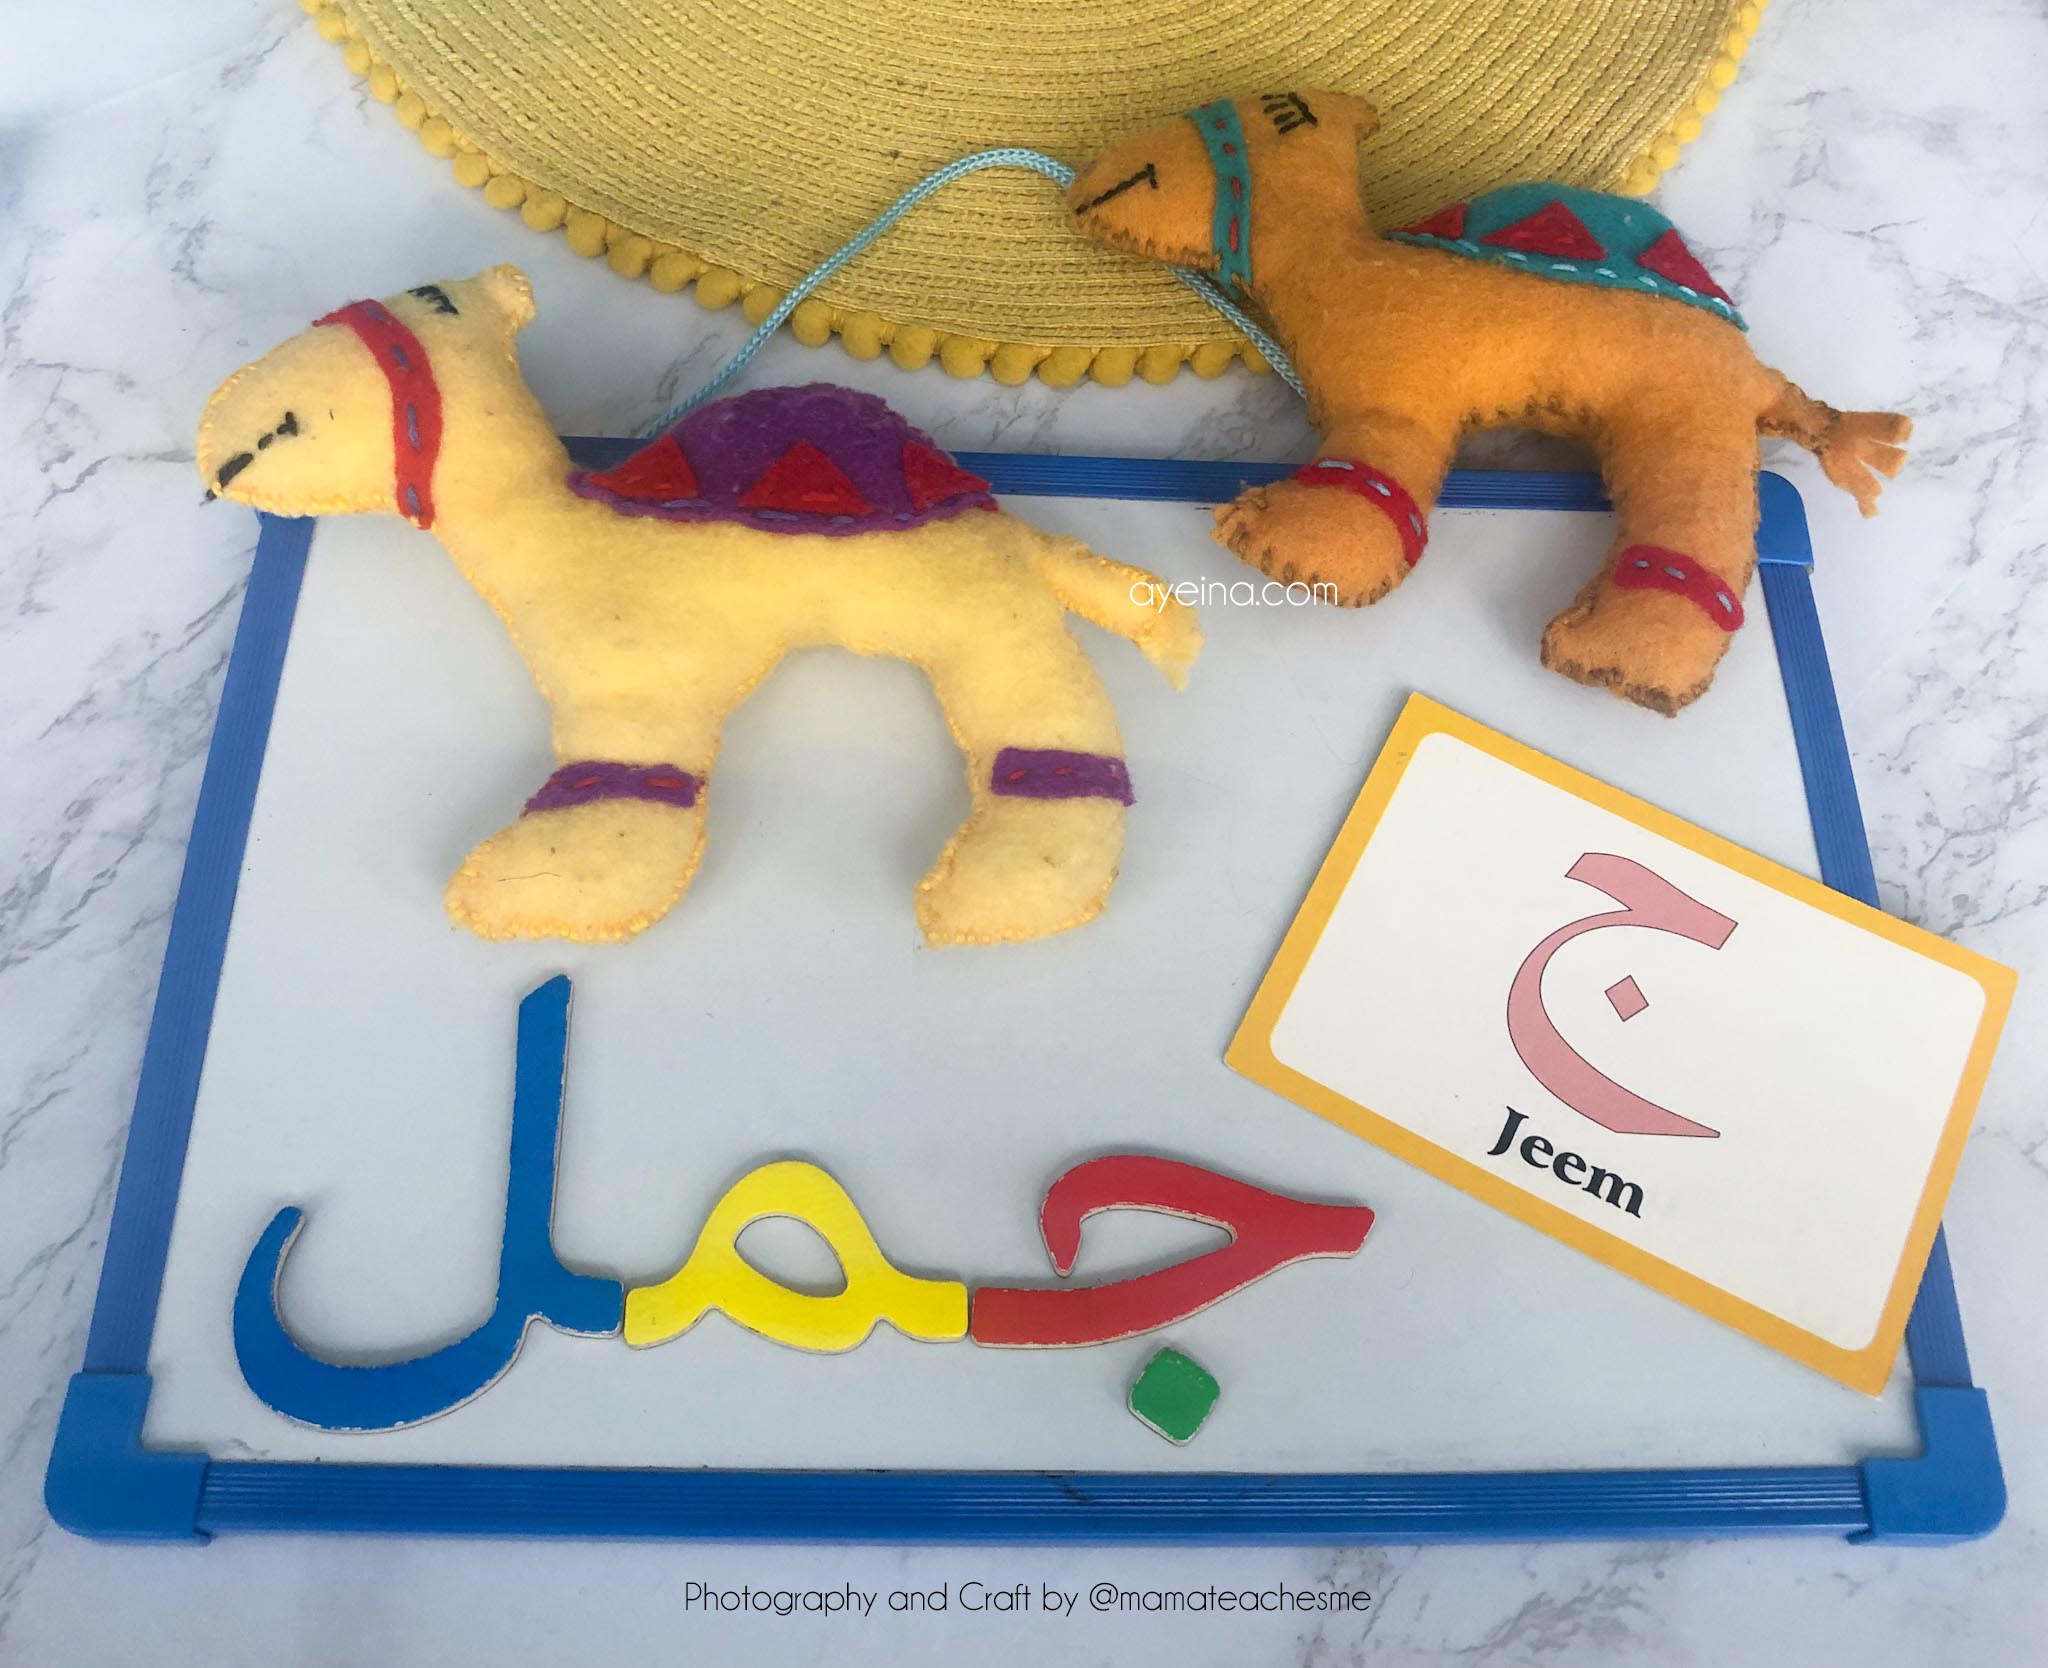
5) Jeem (جمل = ج – Camel)
@mamateachesme made a craft for the letter jeem.
Materials needed for the camel softie: Yellow/brown felt, embroidery floss, scissors and camel template and toy stuffing.
What to do: Trace around the camel drawing on yellow/brown felt using a felt tip pen. You will need 2 pieces of the felt camel template. Trace the camel details on a different coloured felt and cut around them. Sew the triangle pieces to the hump cover. Use the running stitch for ease. Next, sew the hump cover to one of the felt camel templates as pictured. Place the leg and mouth strips and sew them into place using a running stitch. Make a mouth and eye outline using a felt tip pen. Using black embroidery floss, use a backstitch to sew on the mouth and the eyes with eyelashes. Place the felt camel template on top of the other as below. Choose a similar embroidery floss and attach the felt pieces together using a blanket stitch. Sew the felt camel templates all the way round. Leave a large enough gap to stuff the camel softie. Stuff the camel softie as shown. Use a small spoon to make sure the stuffing goes into the legs, head, and tail. Hold the felt pieces together and
continue sewing the hump of the camel softie using the blanket stitch. Keep going until the softie is completely sealed. Well done you just created your own camel softie! Can you make another one to give to a friend?
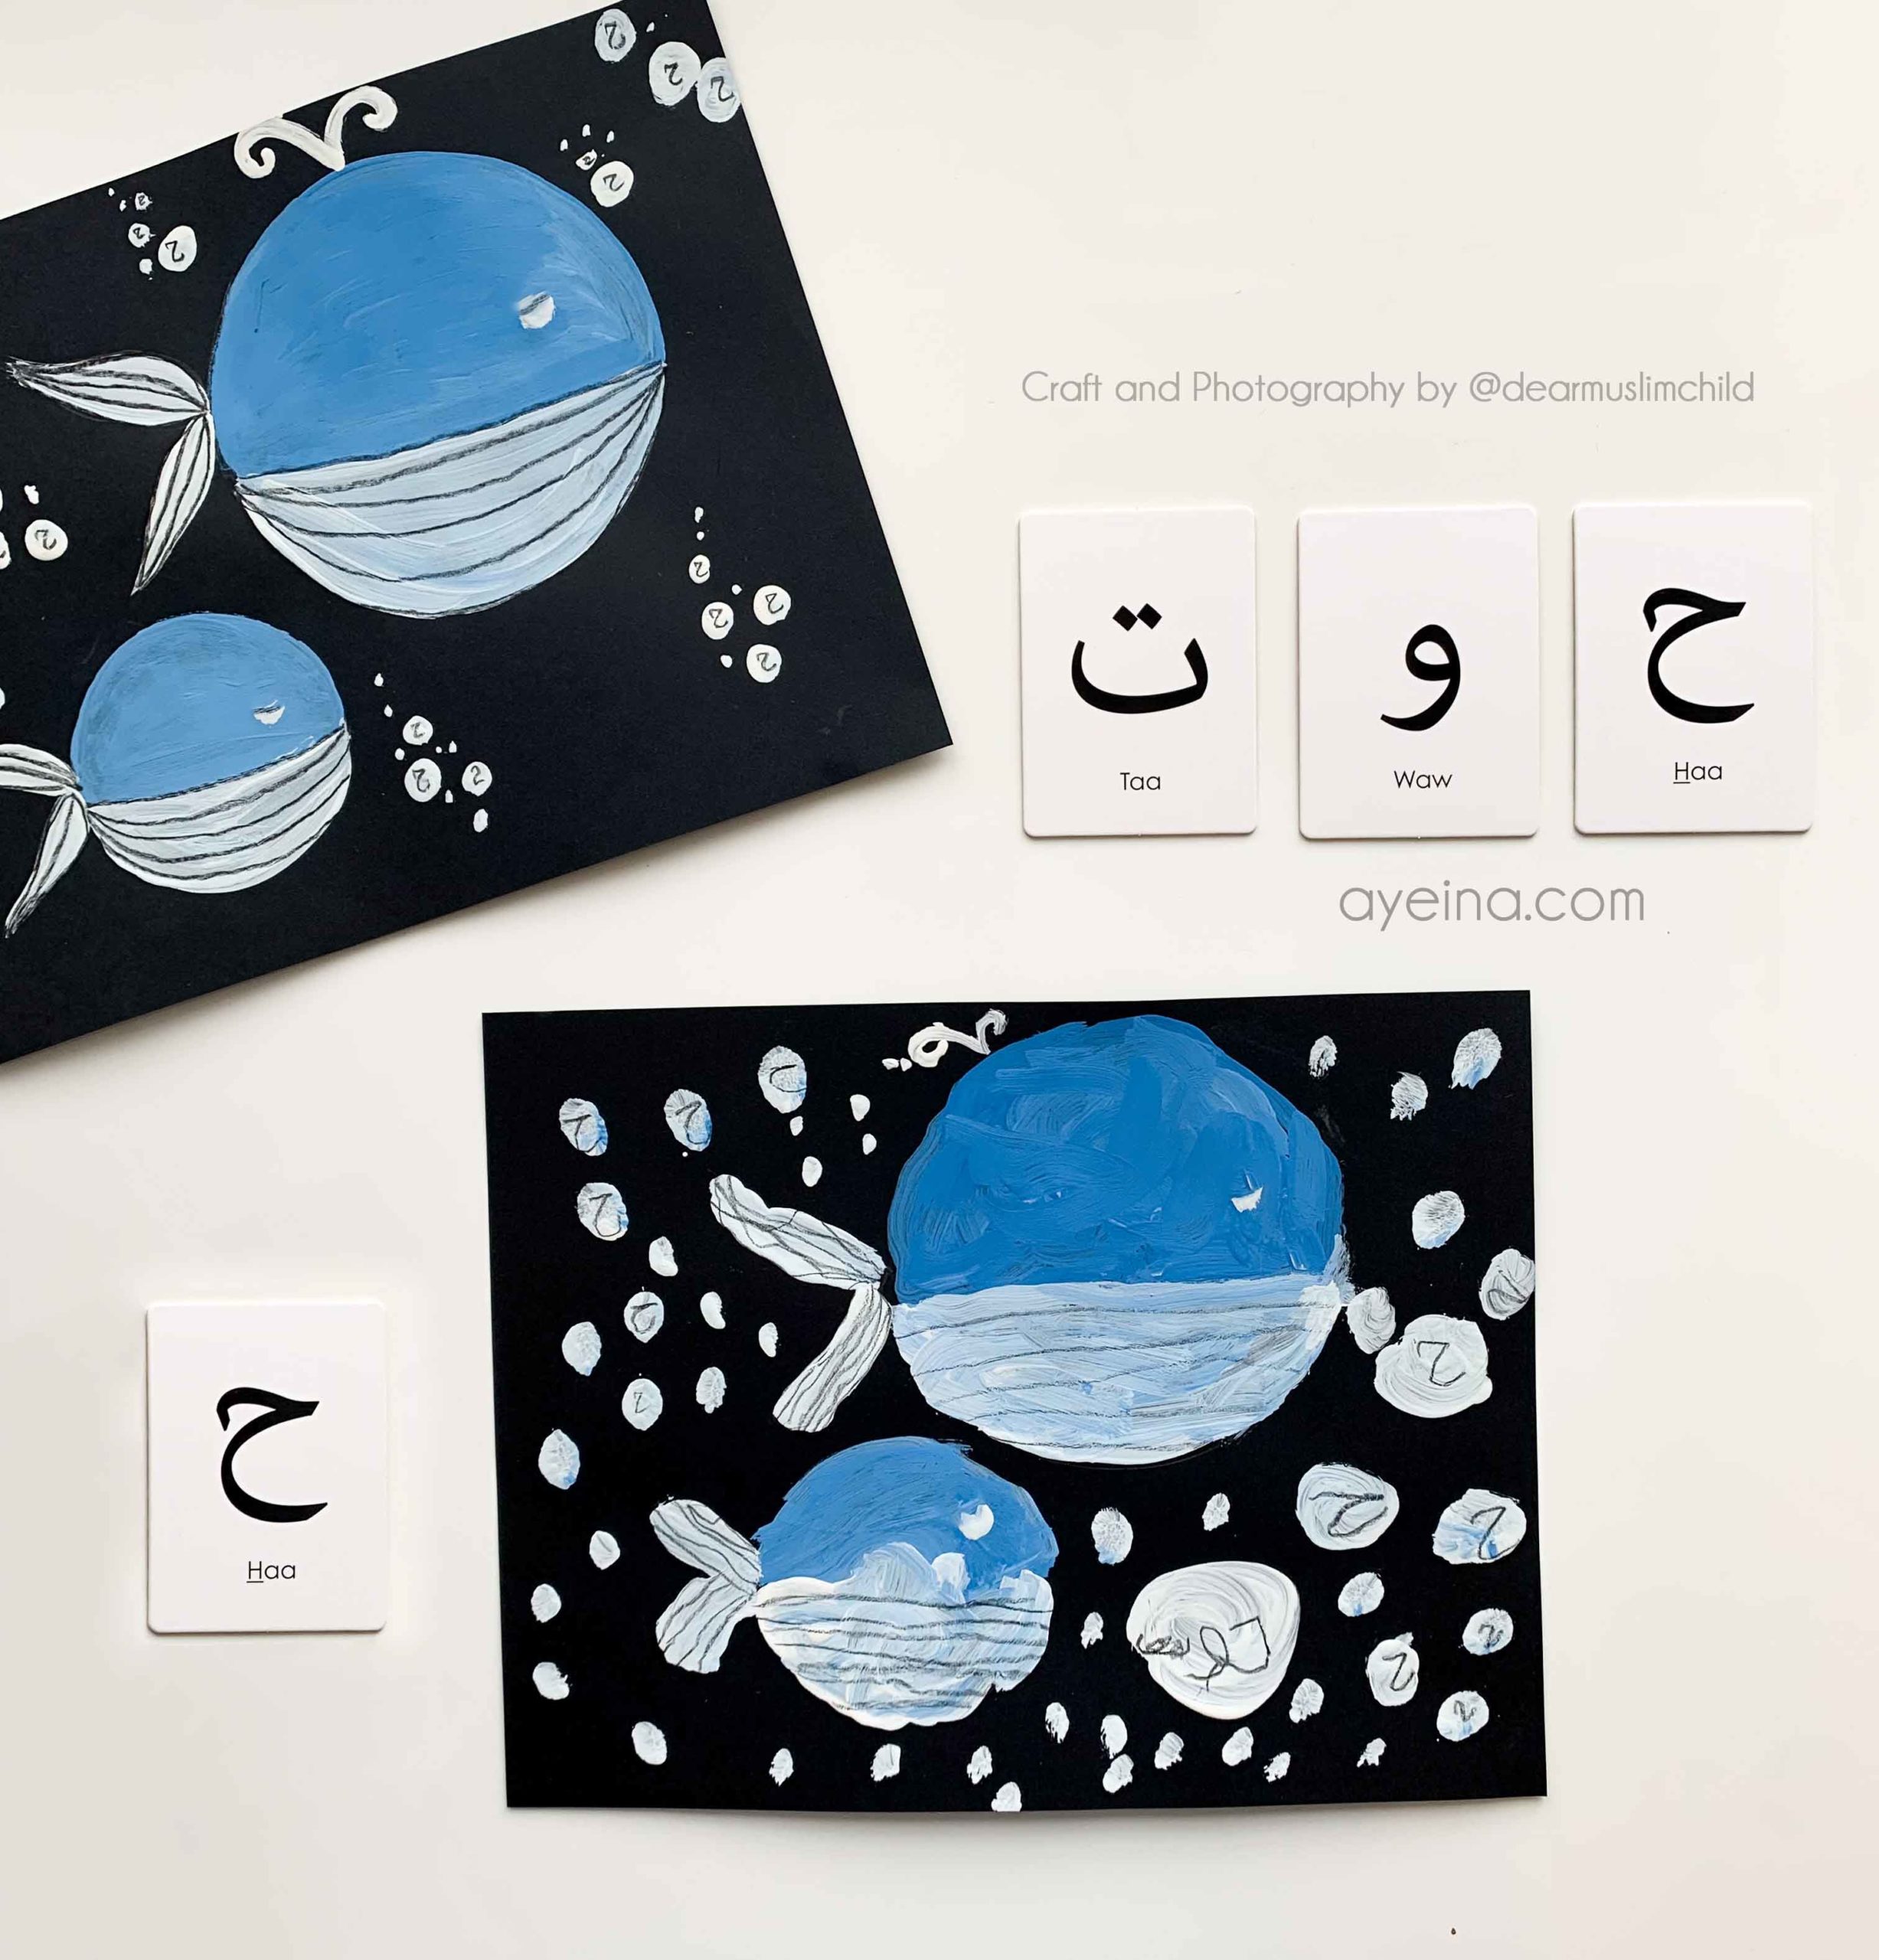
6) Haa (حوت = ح – Fish/Whale)
@dearmuslimchild made a craft for the letter haa.
Materials needed for the craft: Paper, Paint, Paintbrushes, Pencil.
What to do: Start by drawing two circles on your paper – one small, one big. Divide each circle in half. Draw the fins. Paint the top portion of each circle blue, and the bottom portion white. Color the fins white as well. Paint tiny circles around the whales to represent bubbles. Let the painting dry. When dry, write the letter ح on the bubbles and draw lines on the fins and the white portion of the circle.
7) Khaa (خل = خ – Vinegar)
@crazy.in.motherhood made a craft for the letter khaa.
Materials needed for the craft: Clothing to be dyed – white or light coloured, White vinegar, Water-based food colours, Rubber bands, Ziploc plastic bag, Old towels, Gloves (optional).
What to do: To make DIY tie-dyed hijab/tops/scarfs, Mix equal parts water and vinegar in a bucket and soak the cloth in the solution for an hour. Take out the cloth, squeezing out extra liquid. (Might want to go outdoors for the rest!) For a spiral tie-dyed design, lay the garment flat on an old towel (or big plastic cover). Pinch the centre of the garment and start to twist in a clockwise direction, making sure the garment stays as flat as possible. You will now have a cake-shaped garment. To keep this in place, put on rubber bands (2 or 3), making sure the segments are equal. Now get the gloves on(if you weren’t wearing them already) for the fun part! Mix your food colours in the water, each in a different bowl (if you have old bottles, those would work great!). Remember, the shade will get lighter on cloth at the end, so keep the shade a notch darker than desired. Now, all you have to do is pour the colours on the cloth. You can alternate colours by segments, just do one colour…it’s completely up to you! Once done, put the cloth cake (rubber bands and all) into a zip lock bag and leave it overnight for the dye to get locked onto the cloth fibres.
Next day, rinse the cloth well, dry off and dazzle the world with your masterpiece! Perfect for salahbrations, Taraweeh prayers or Eid gifts!
Note: this DIY dye will fade over time and with consecutive washes, however, that just gives you the opportunity to make another one!

8) Daal (دعاء = د – Supplication)
@teachingtwolittlekids made a craft for the letter daal.
Materials needed for the dua tree: Cardboard, craft paper, glue, scissor, pen.
What to do: It’s fairly easy to make, using cardboard cut outs of trees and putting slits in the tree to let it join and using any craft paper/scrap paper to decorate. It’s our dua tree.

9) Dhaal (ذئب = ذ – Wolf)
@habiba_momming_baking made a craft for the letter dhaal.
Materials needed for the craft: One empty roll of bath tissues, Strings (light colors), Glue, Crayons (colored pencils), Pencil, Recycled bottle cap, Paper, Scissors.
What to do: Start by drawing wolf’s face and tale, color and cut. Then, for the hands, on two sides of the roll (on the middle) make a hole with the tip of the pencil or something sharp. Repeat on the bottom, close to the edge, those will be for the legs.
Insert the strings through the holes. For the hands, make a knot at the ending of each string. To make the feet, you need to make a little hole on each of the bottle cap with a tip of a knife. Be careful. This part is only for adults. Then insert the strings through the cap and make a knot on each side. Glue the face and the tale of the wolf to the roll. Now we are done.

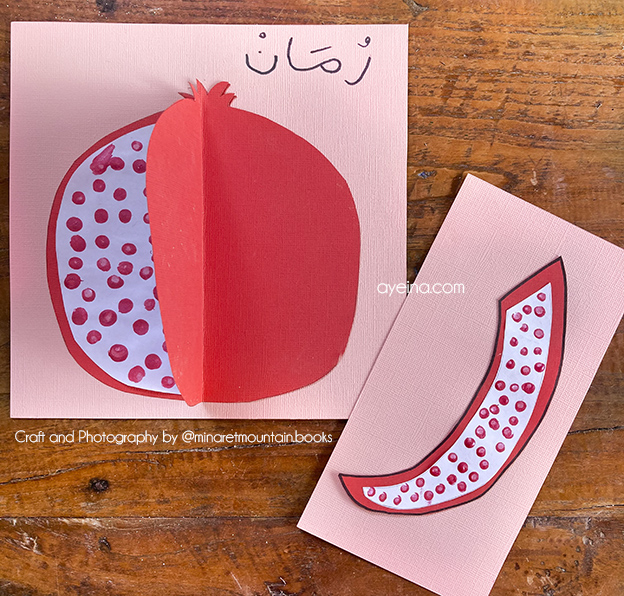
10) Raa (رمان = ر – Pomegranate)
@minaretmountain.books made a craft for the letter raa.
Materials needed for the 3D pomegranate: 2 sheets of red cardstock, 1 sheet of white paper, 2 sheets of pink or any colour, Red paint, Cotton buds, Glue stick, Scissors, Pencil.
What to do: Cut out 2 identical shapes of a pomegranate on the red cardstock. Cut out a smaller round shape. Mark out in pencil where you would like to keep the veins visible. Use the cotton bud and red paint, dot paint on the white paper, to represent the pomegranate seeds. Once dried, fold it in half. Fold in half one of the red pomegranate shapes and glue half the white paper inside. Glue the folding pomegranate on top of the flat pomegranate cardstock. Glue the other side of the white paper, down to the flat pomegranate cardstock. This should make a pomegranate flap, to open up and show all the seeds inside.
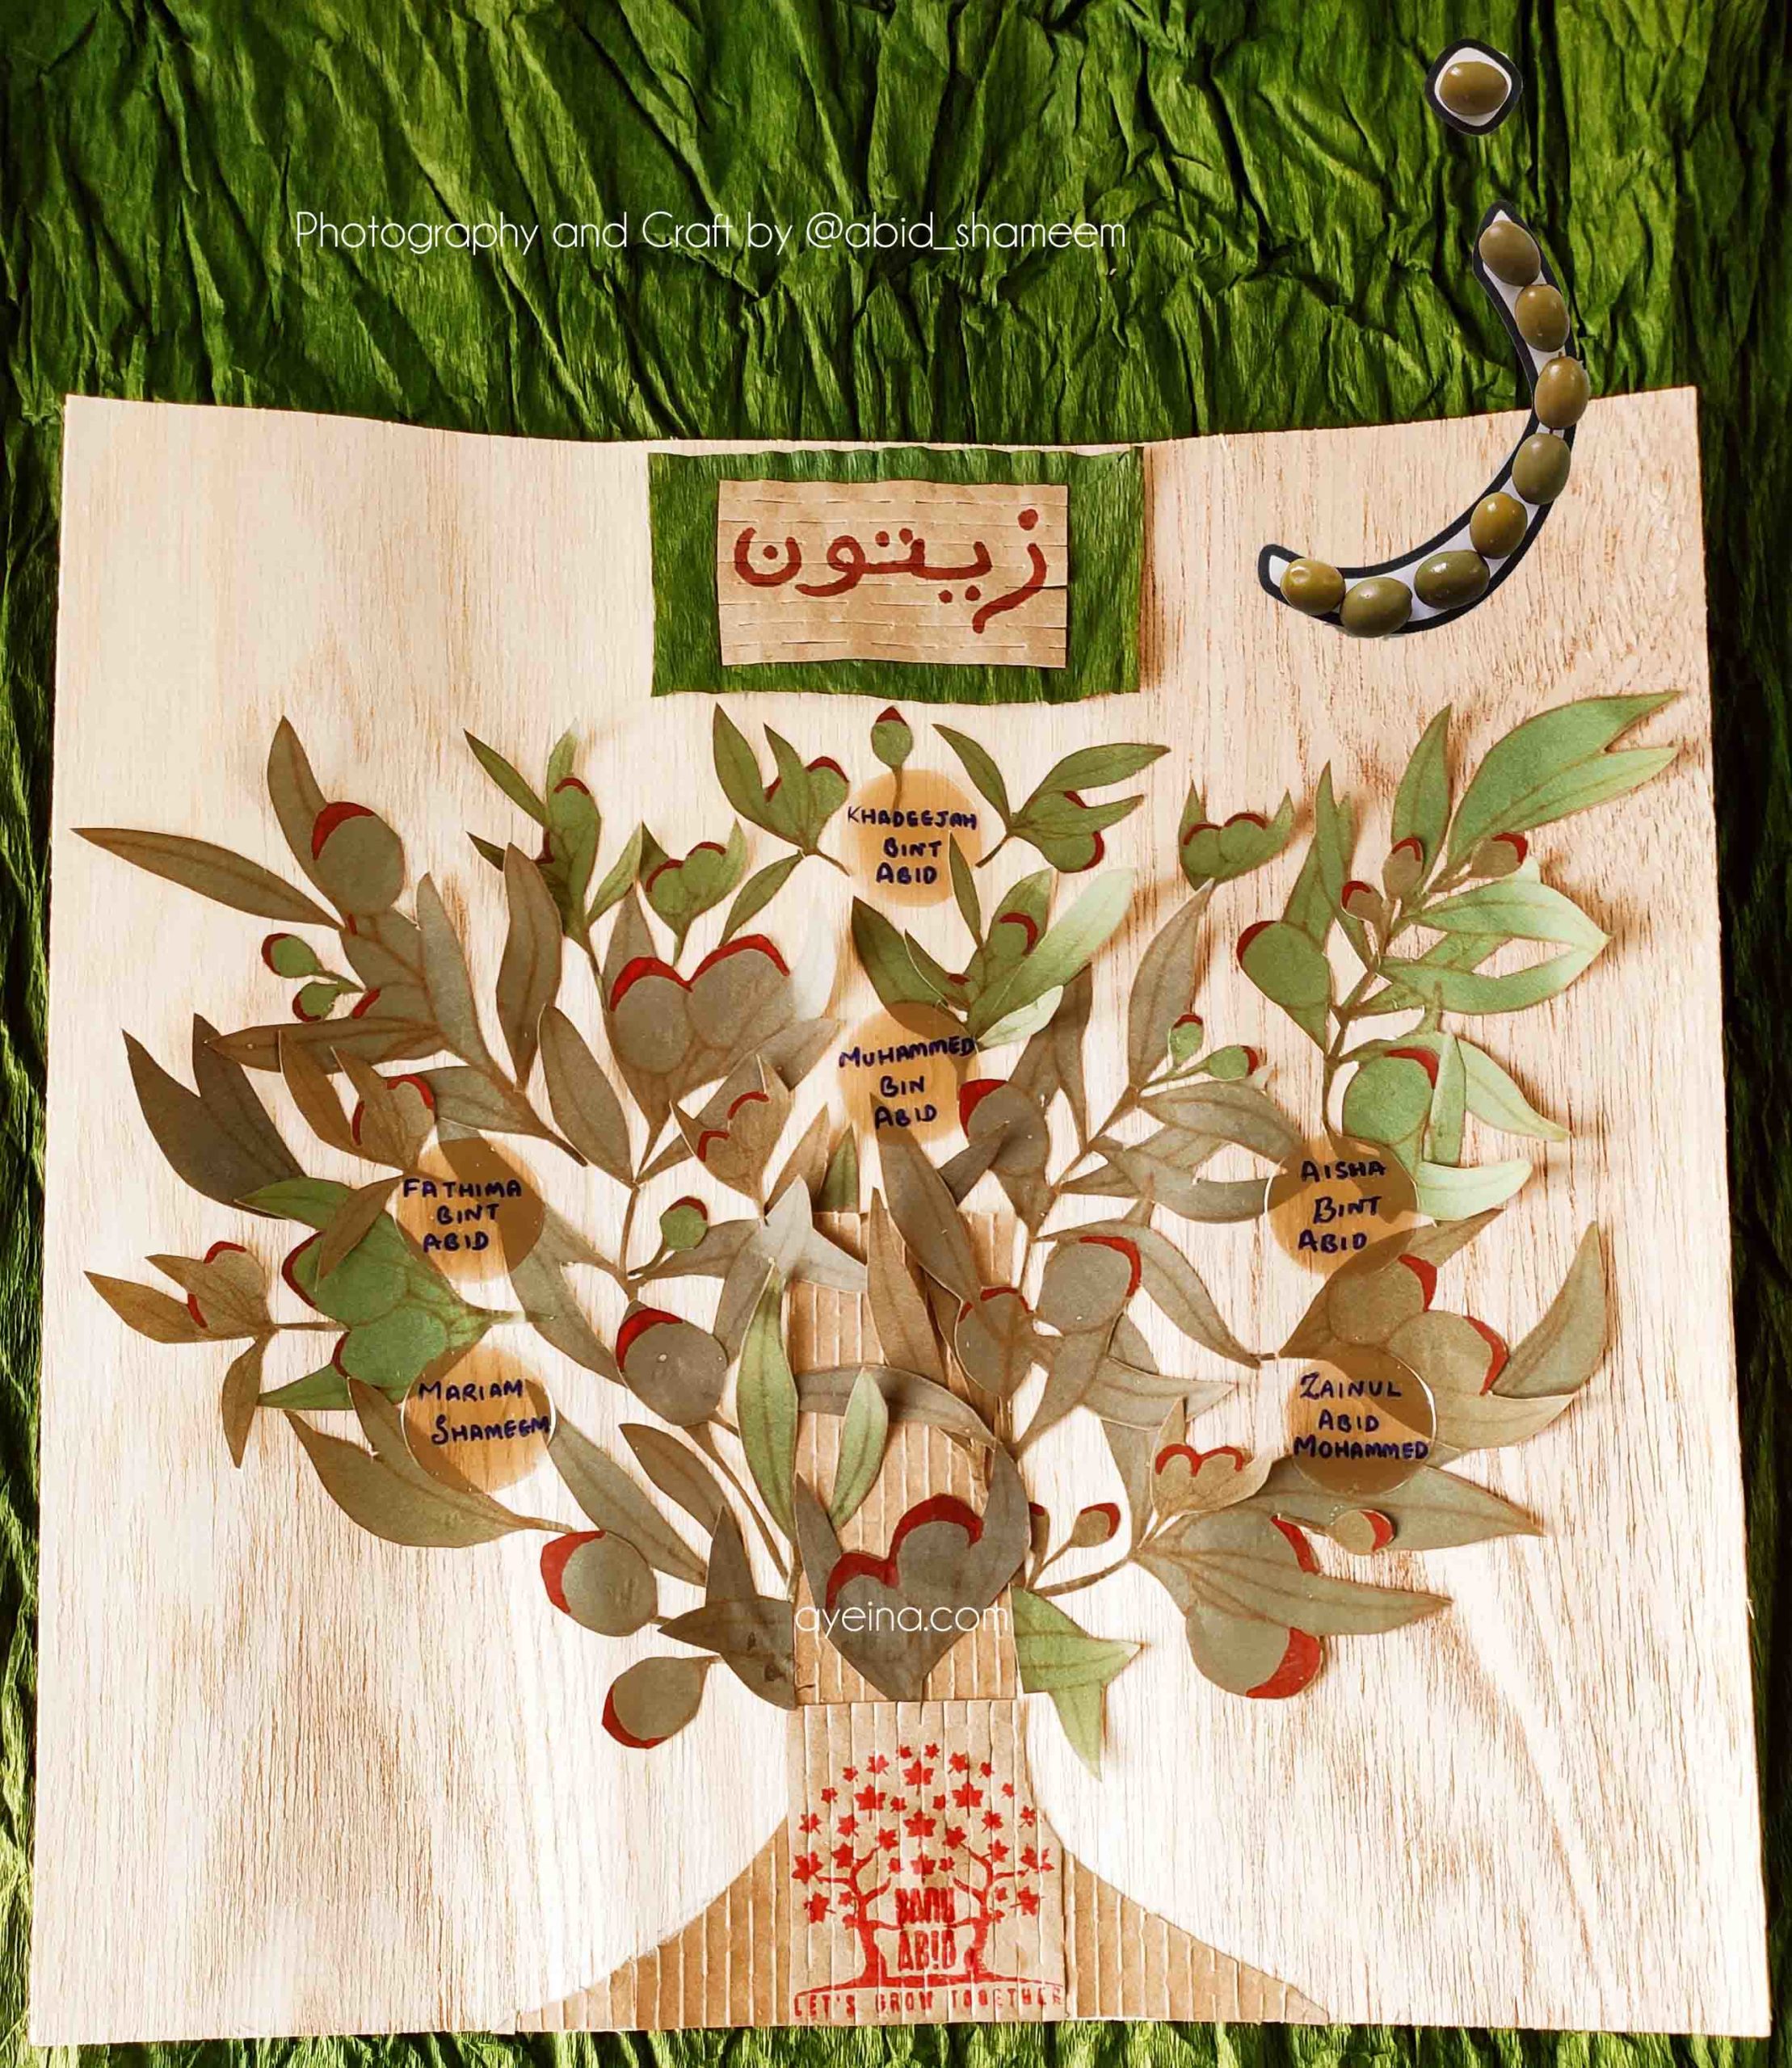
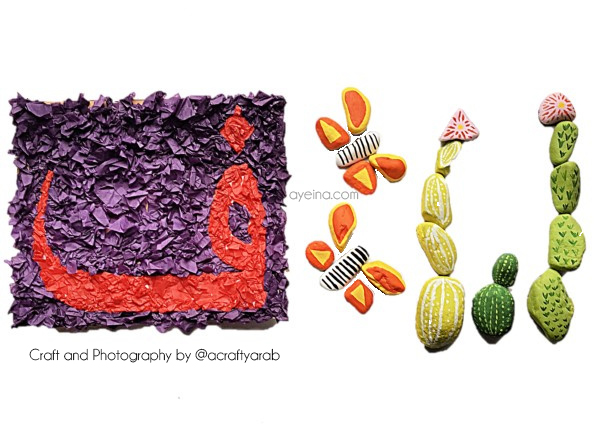
11) Zaa (زيتون = ز – Olive)
@abid_shameem made a craft for the letter zaa. Zaa is for Zaytoon as a Zaytoon tree (family). Zaytoon (Olive) is a blessed tree which is mentioned in Qur’an.
Materials needed for the craft: 1*1 feet core veneer( of neem tree) any other brown paper or normal paper can be used. Differents shades of olive colour paper ,small coin sized cut round golden paper. red sketch, scissor, glue.
What to do: Make different size of olive leaves and olives on different shades of Olive coloured paper.. cut them neatly and colour the top of the olive with red sketch… Make a trunk using a brown paper.. and keep sticking the leaves and olives to fill the tree.. write the names of your family on the golden round paper and stick in different places of the tree..Your family tree is ready .We also decorated letter Zaa with olives.
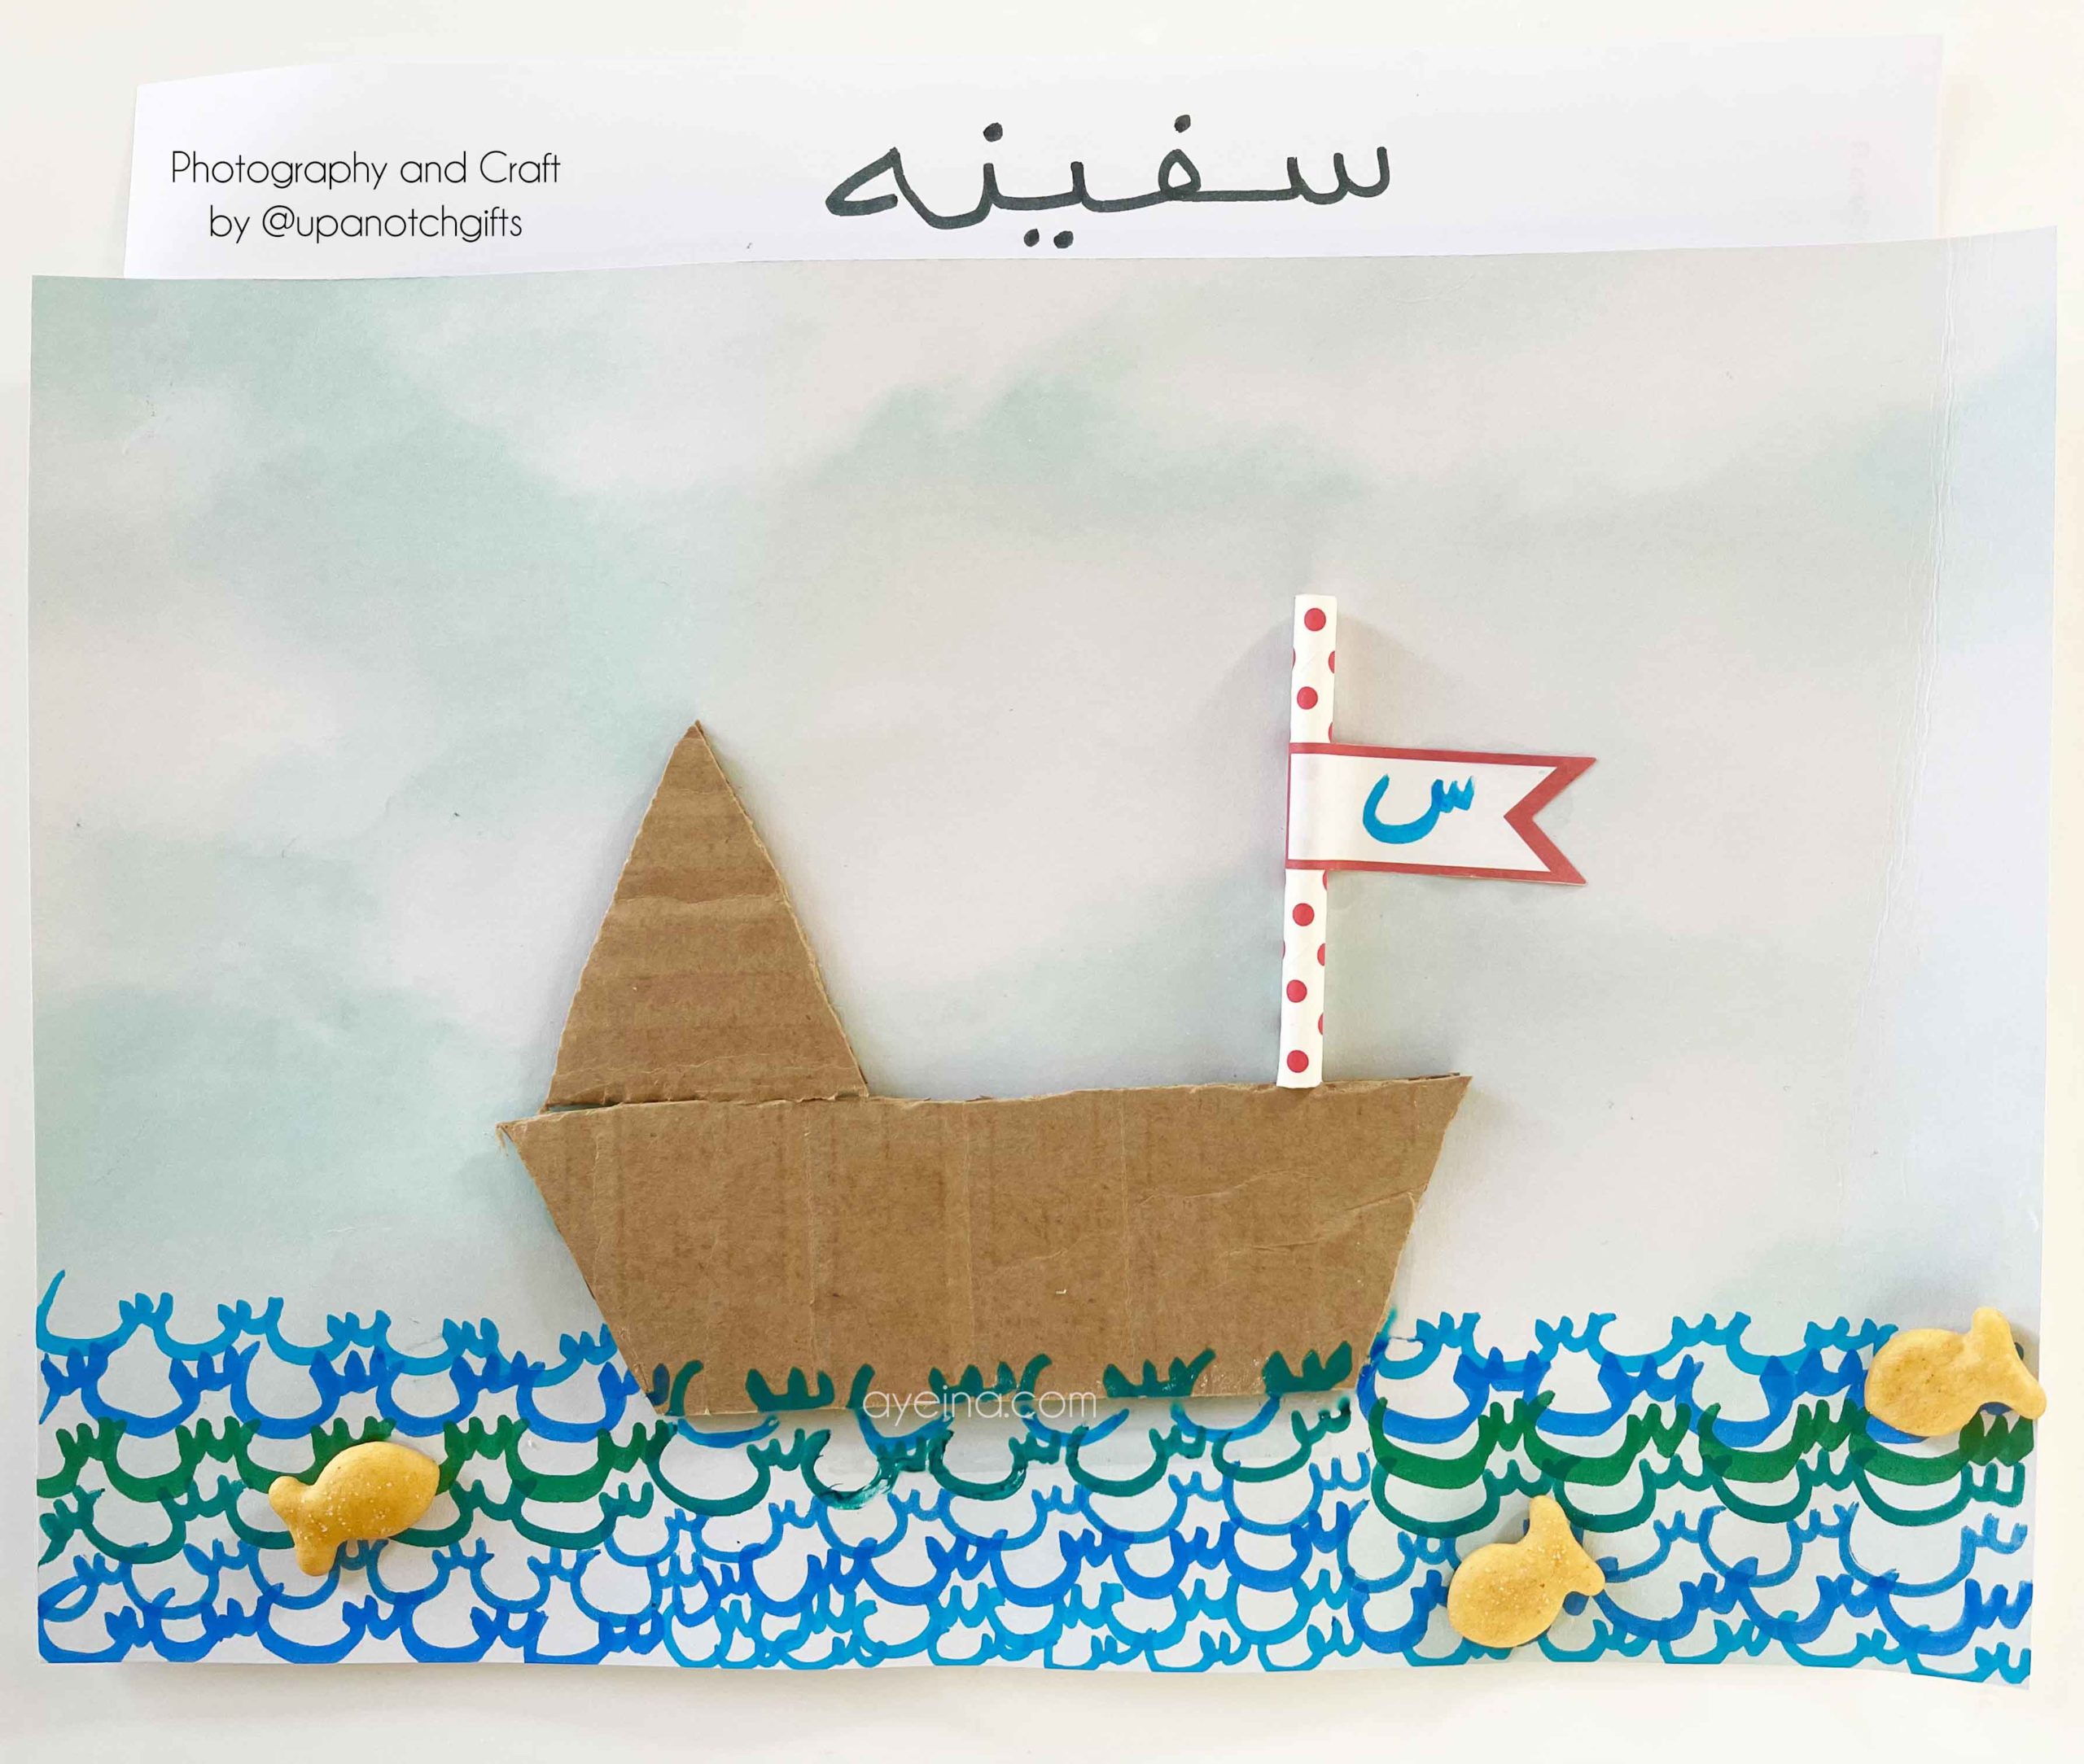
12) Seen (سفينة = س – Ship)
@upanotchgifts made a craft for the letter seen. While safeenah (boat) is with seen, readers can try to find 3 other seen things too. Samak (fish), samaa (sky) and sahaab (clouds). I made the waves of the sea like the letter too to remind kids that the letter with the waves is seen like the sea.
Materials needed for the craft: Light blue paper or color white paper light blue, Empty cardboard box for the boat, Straw for the flag, Blue and green Markers, Goldfish crackers.
What to do: Cut out a safeenah (boat) from cardboard. Glue it to a piece of paper. Glue a straw for the flag. Use blue and green markers to make the waves in the sea. Write the Arabic letter seen one after the other. Add goldfish crackers in the sea. Add clouds with cotton balls. My paper already had the clouds on it. Find four things in this picture that begin with the letter seen.
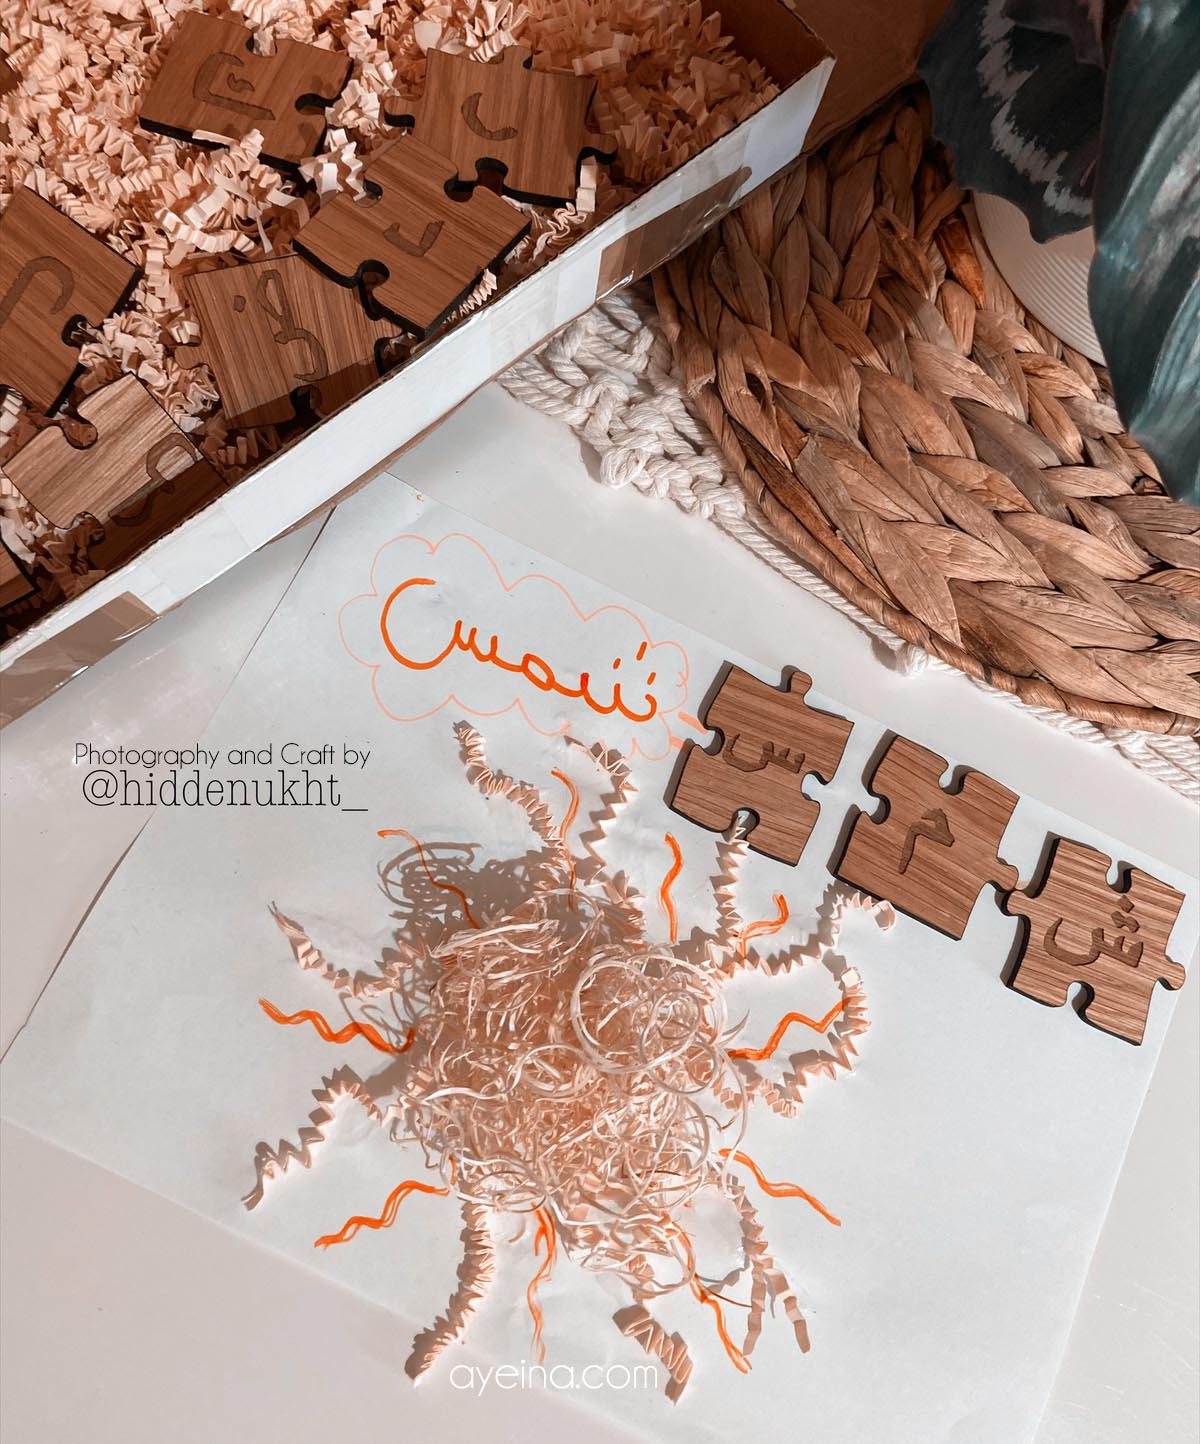
13) Sheen (شمس = ش – Sun)
@hiddenukht_ made a craft for the letter sheen.
Materials needed for the craft: 2 pieces of paper, colouring pencils or pens, any type of craft material you can get creative with ( for me I didn’t have anything so I decided to use and recycle some confetti paper I had from some parcels I received as you can see), glue, scissors, Arabic alphabet puzzle (or you can just draw the alphabets out and cut individually).
What to do: I wrote the letter ش ( sheen) out and cut around it so Sulayman could identify the letter we were learning today and got him to repeat it a few times as well as named a few things that begin with that letter, his favorite word was shams /sun so we choose that word to use for this activity. I roughly sketched a circle in the middle of the paper and then put glue in the middle, then asked Sulayman to help me add the paper confetti in the middle and also added some around the sun as seen. Once that had dried I got my son’s hand and helped him trace some Squigley lines alongside the parts coming out from the sun. I then added the puzzle pieces and made the word شمس with it and got my son to place them in the top right corner of the paper. Then I wrote the word out properly in the left-hand corner so the letters were all joined and voila that’s it as simple as that.
14) Sawd (صلاة = ص – Prayer)
@misssanateaches made a craft for the letter sawd.
Materials needed for the craft: Wood house frame, 2 wooden hearts cut into a dome shape, 1 square or rectangle piece of wood, Acrylic Paint + paint brush, Felt, Scissors, Glue Gun.
What to do: Glue the dome shaped wood pieces onto the top of both sides of the house frame to create the masjid domes. Glue the square/rectangle piece of wood to the back of the house frame to create the back wall of the masjid. Paint the masjid using your preferred colours/designs. Use the felt pieces to create a mini sejadah to place on the floor of the masjid. Feel free to add your own details.

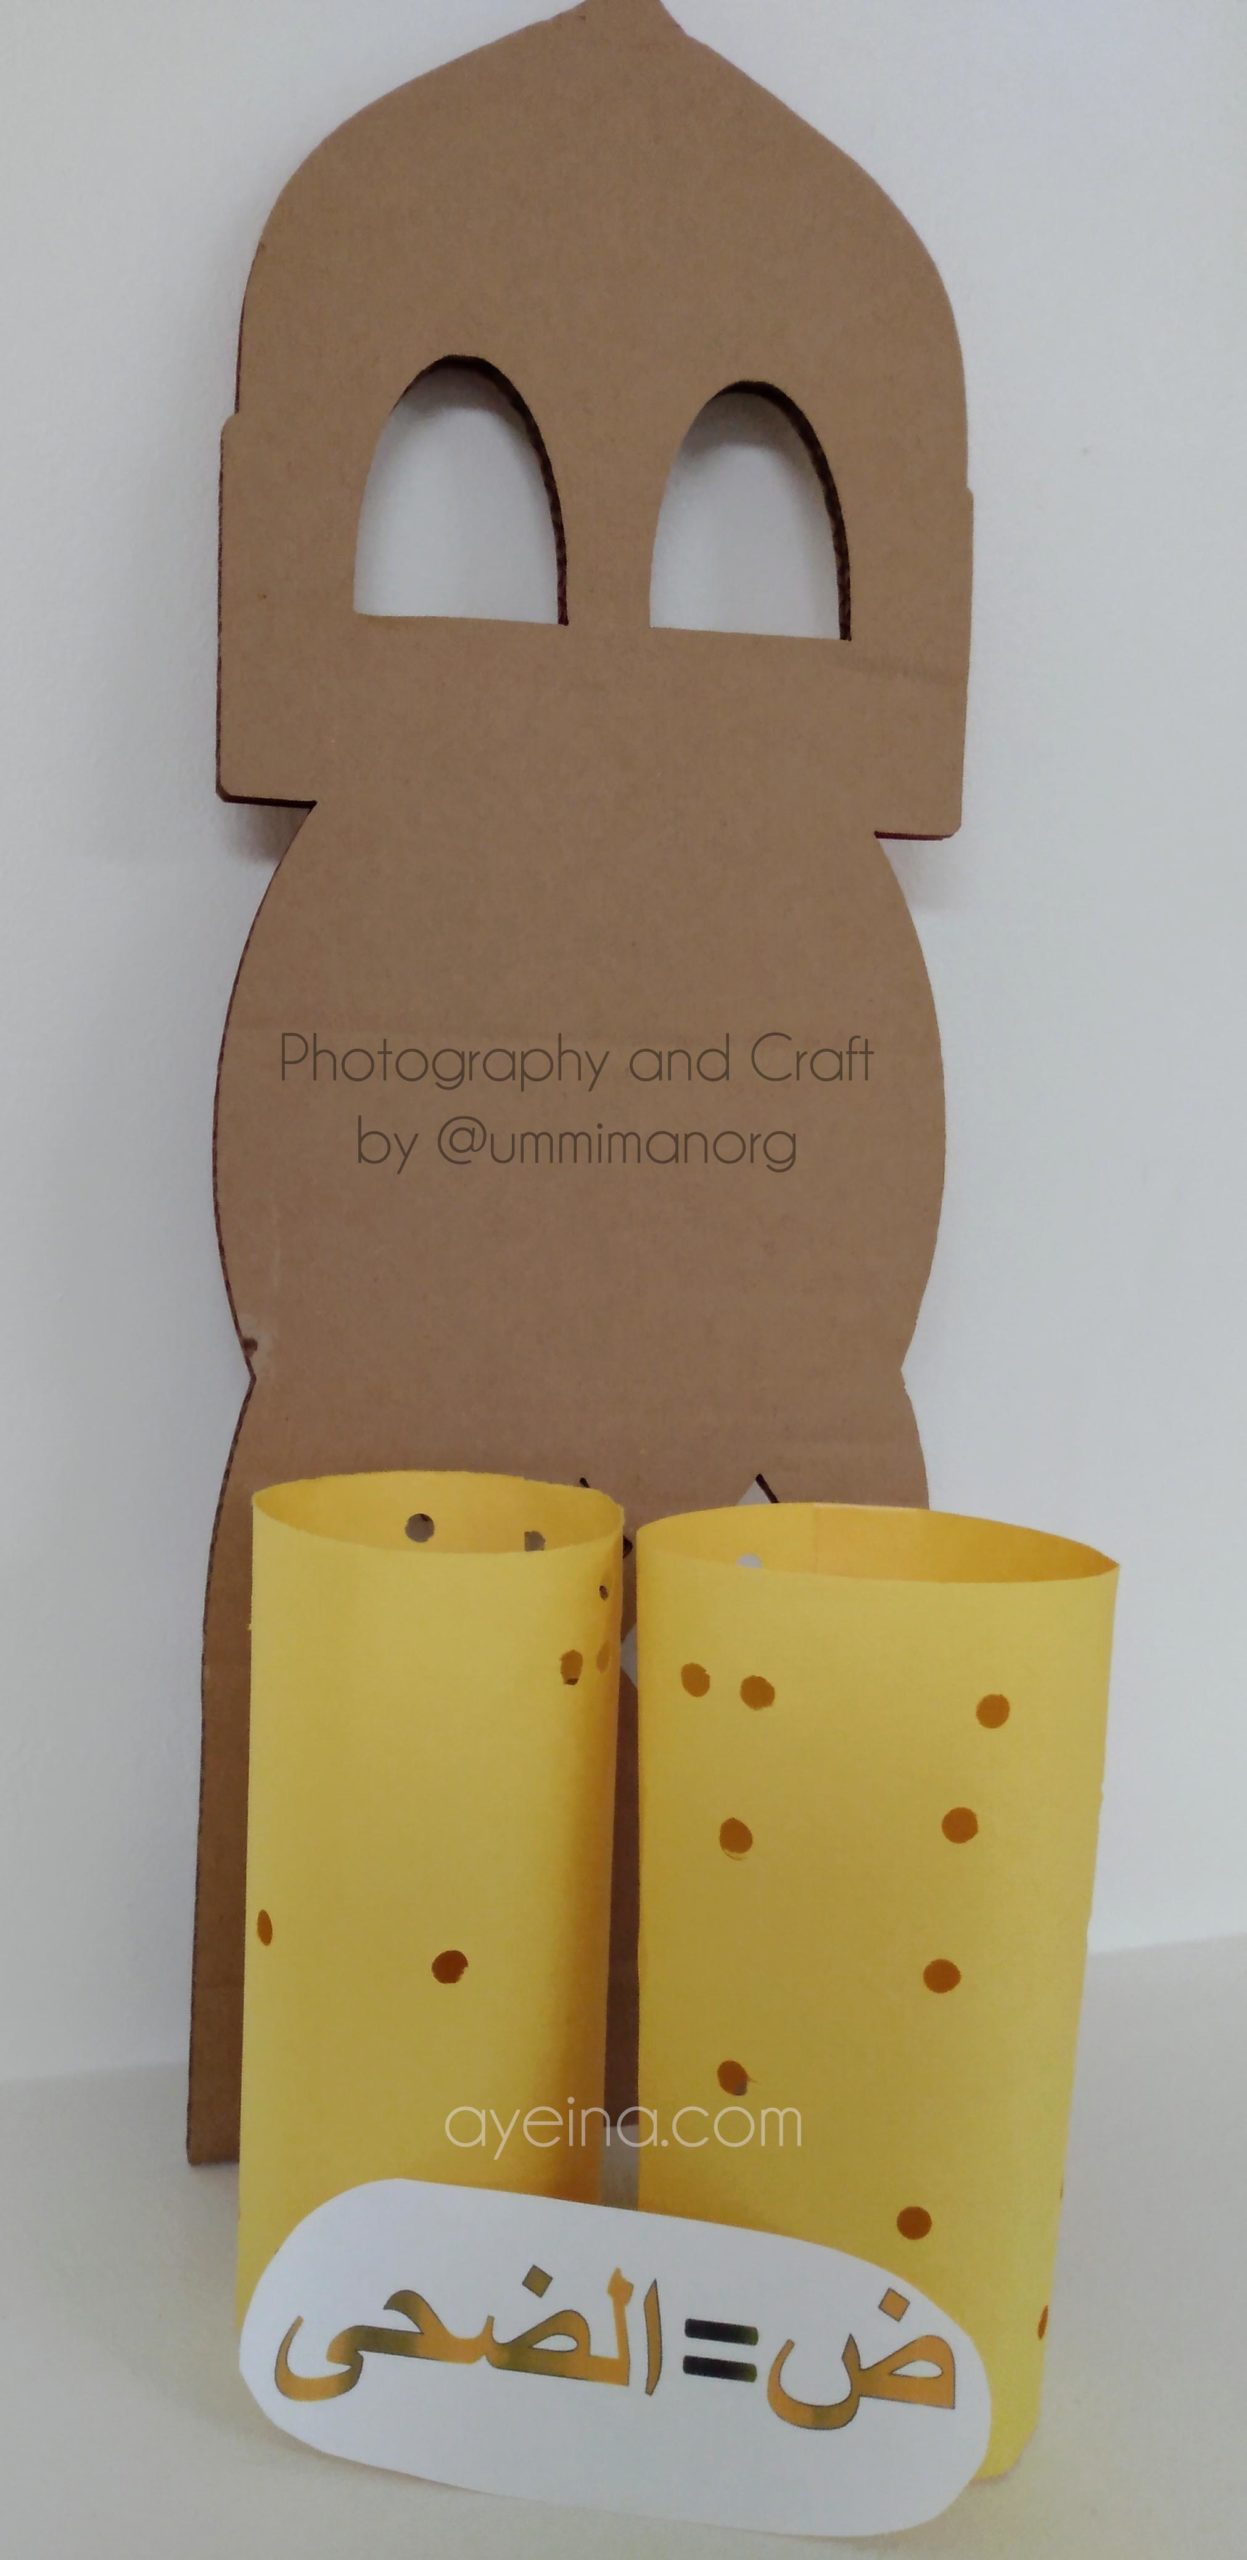
15) Dawd (ضحى = ض – Forenoon)
@ummimanorg made a craft for the letter dawd.
Materials needed for the craft: Yellow Construction Paper (Can be substituted with paper cups or craft paper), Single Hole Punch, Clear Scotch Tape, Battery-Operated Tea Candle/Light.
What to do: Place your construction paper in front of you horizontally and fold it in half. Cut along the crease to create two smaller sized papers. Use your hole punch to create holes around the paper. To create holes in the center of the paper, gently fold the paper in half and use the hole punch. (You don’t want to fold the paper too hard, as this will create new lines. Folding it gently and punching will also produce two holes, as opposed to one. When you are finished creating your holes, bring the two short sides of the paper together and stick them together using tape. Turn on your tea light and place the finished lantern over it. Enjoy the light!
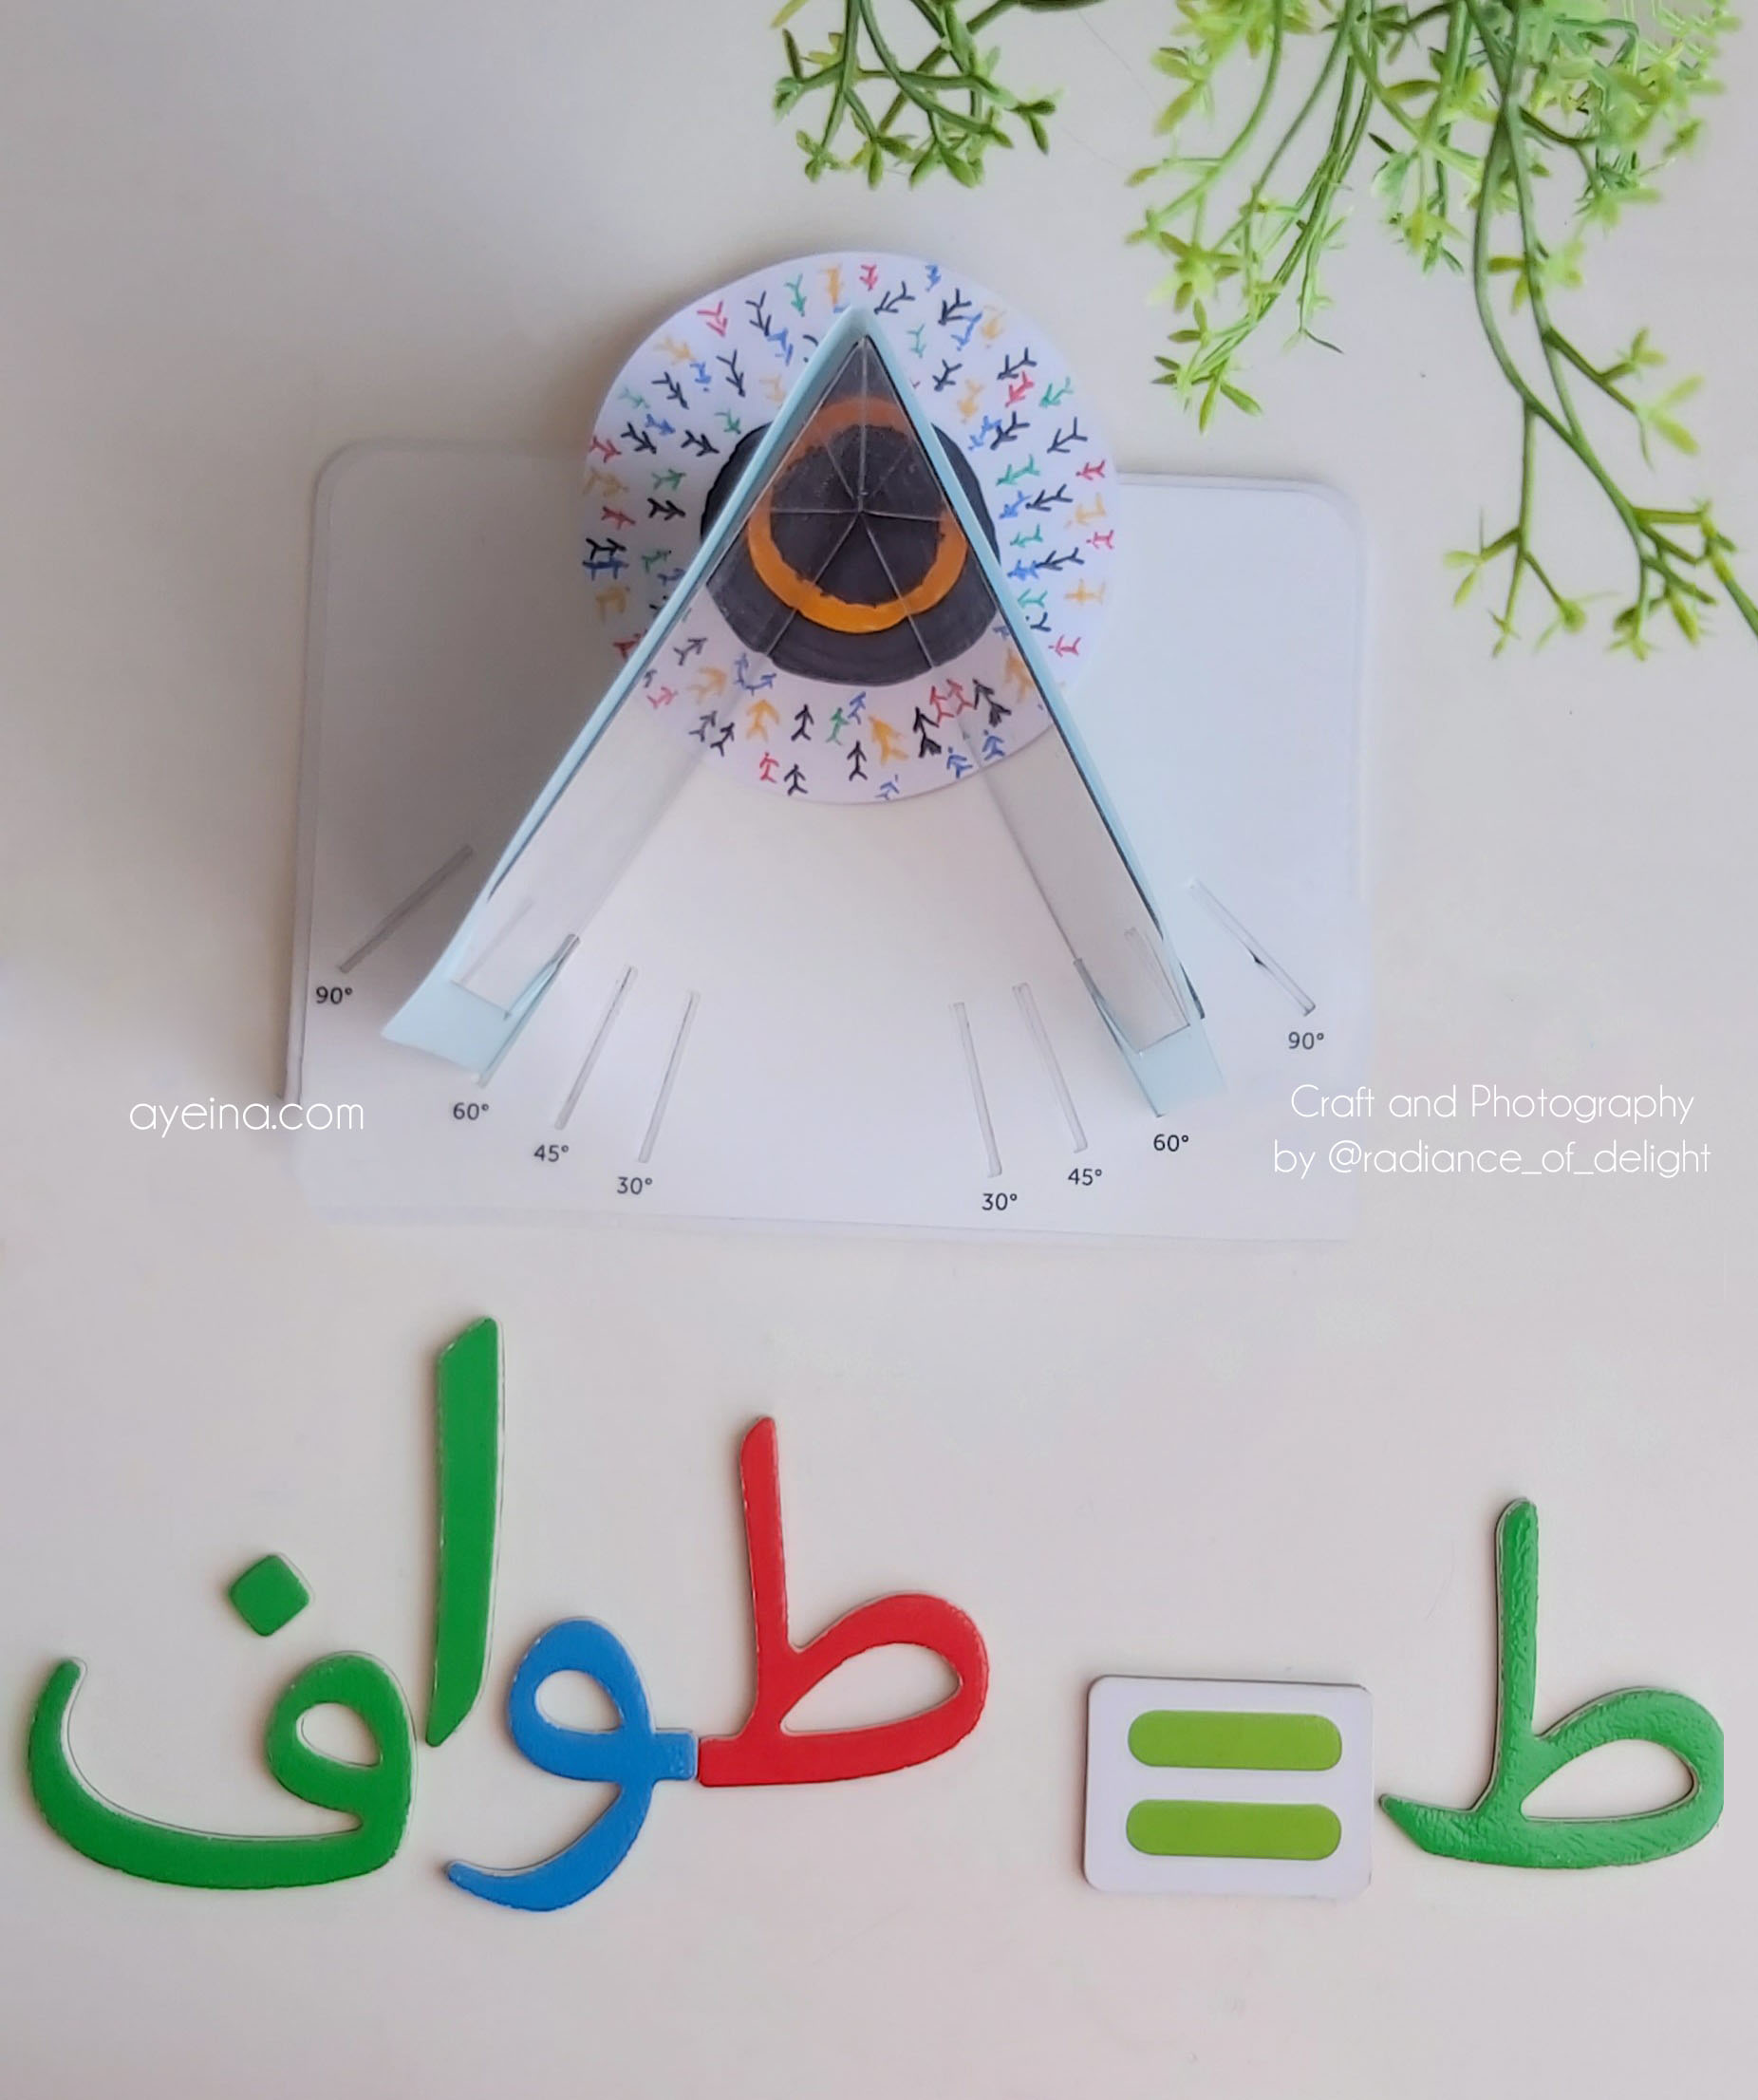
16) Taw (طواف = ط – Circumambulation)
@earthcustodians.ca made a craft for the letter taw.
Materials needed for the craft: 2 mirrors with some holder can be made out of cereal box as well to hold the mirrors, Plain piece of paper cut in a circle.
What to do: I have used kelidoscope to teach my kids tawaf around kabah in makkah. Using colored markers make circular kabah and some random people around it. Now when you will place the paper under the standing kelidoscope it will create beautiful symmetrical shapes that feels like people revolving around kabah and doing tawaf.
17) Dhaw (ظلال = ظ – Shade)
@dr_malihasaman made a craft for the letter dhaw.
Materials needed for the craft: 2 photo frames 7”x 5”, White & black foam board, Glitter foam sheets, String led lights, Glue, Wooden log slices (optional).
What to do: Firstly dismantle the photo frames and tape the led lights along the borders of frame 1. Then decide upon a pattern that you would like to cast shadow of, and draw it on a white foam board. Measure the borders to fit the board and cut the pattern out so as to provides a snug fit into the frame. Place the frame 2 and then the black foam board as a next layer, these layers of boards and frames provide more depth to the image. Close the set up with the cover. Switch on the LED lights and watch the shadow cast of your pattern on the second frame.

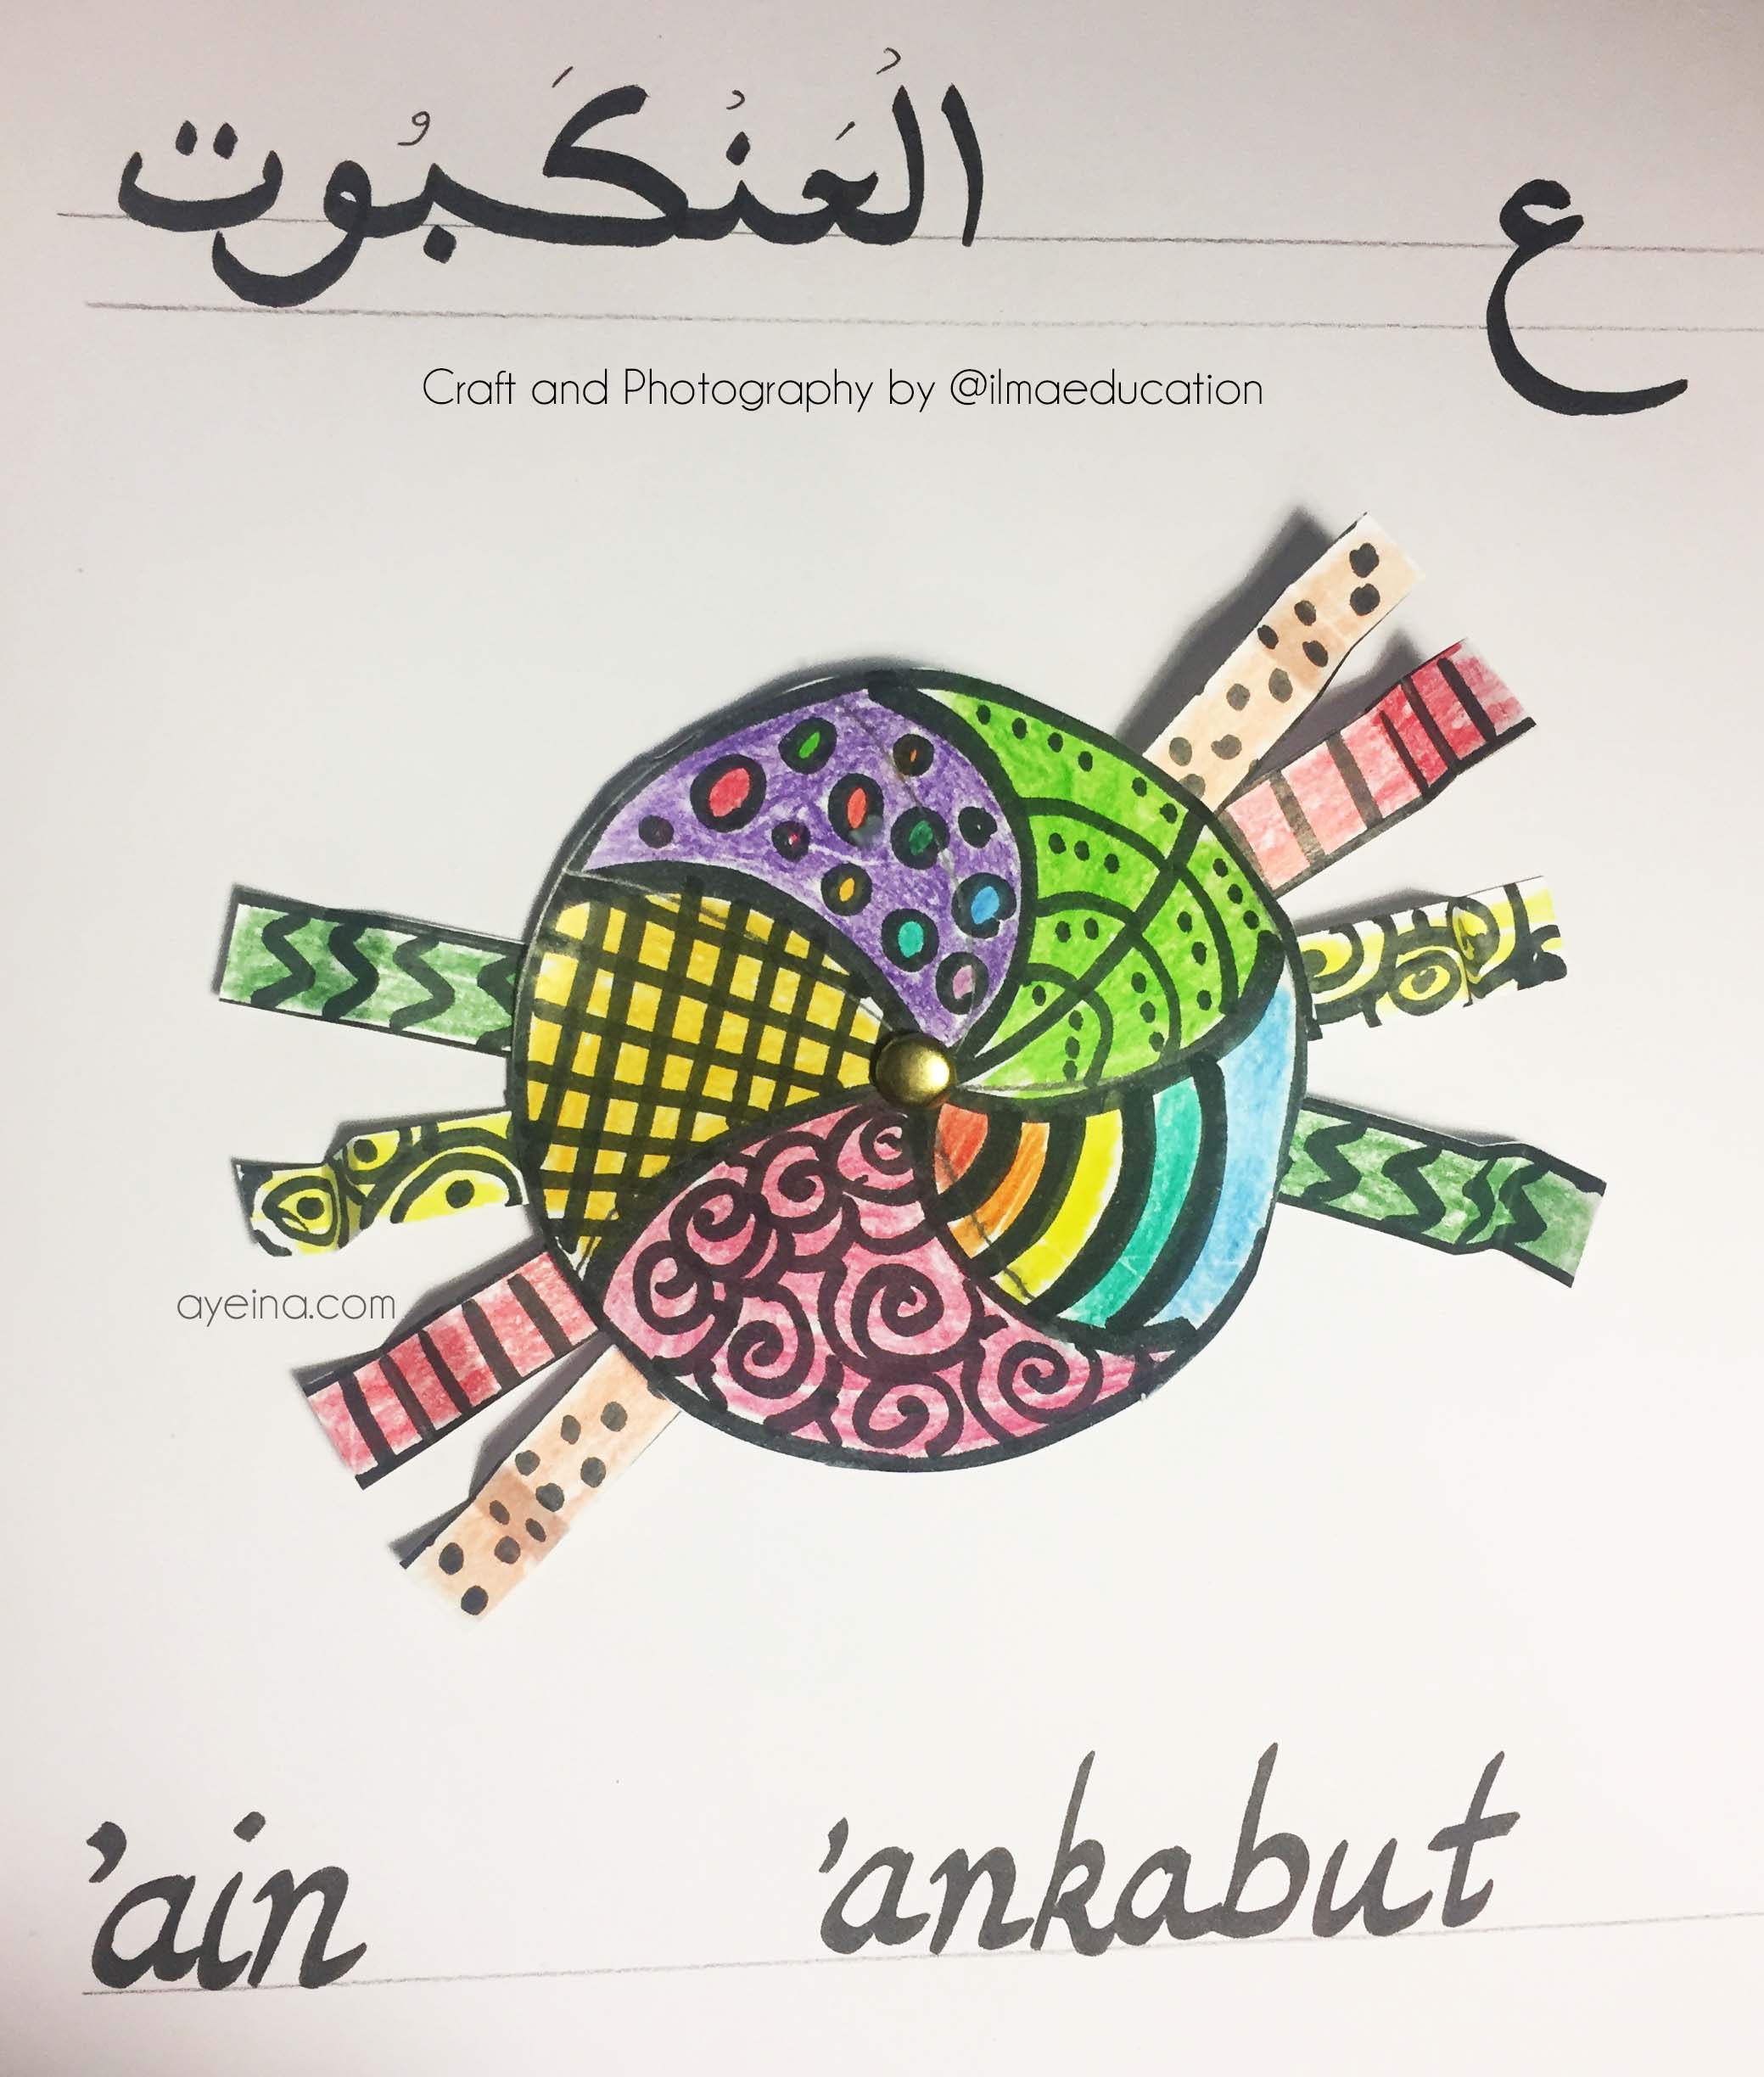
18) ‘Aeen (عنكبوت = ع – Spider)
@ilmaeducation made a craft for the letter ‘aeen.
Materials needed for the craft: A5 paper, Pencil, Black marker, Round object to trace circle (about 8-10cm), ruler, Colour pencils, Scissors, Split pin, string (Optional).
What to do: Place circle object (cup, tin, container) on top of the piece of paper. Use a pencil to trace around the circle. Use the ruler and the black marker to draw 4 lines at the bottom of the paper. Take the black marker and trace the circle. Use the black marker to draw patterns on the circle and in the 4 strips created by the 4 lines. Colour in the patterns. Cut and Push the split pin into the center of the circle. Stack the 4 strips. Find the middle of the strips and push the split pin through the 4 strips. Fan out the 4 strips. These are the spider’s 8 legs. Fold the tip of each leg, accordion style. Optional: attach a piece of string around the top of the split pin.
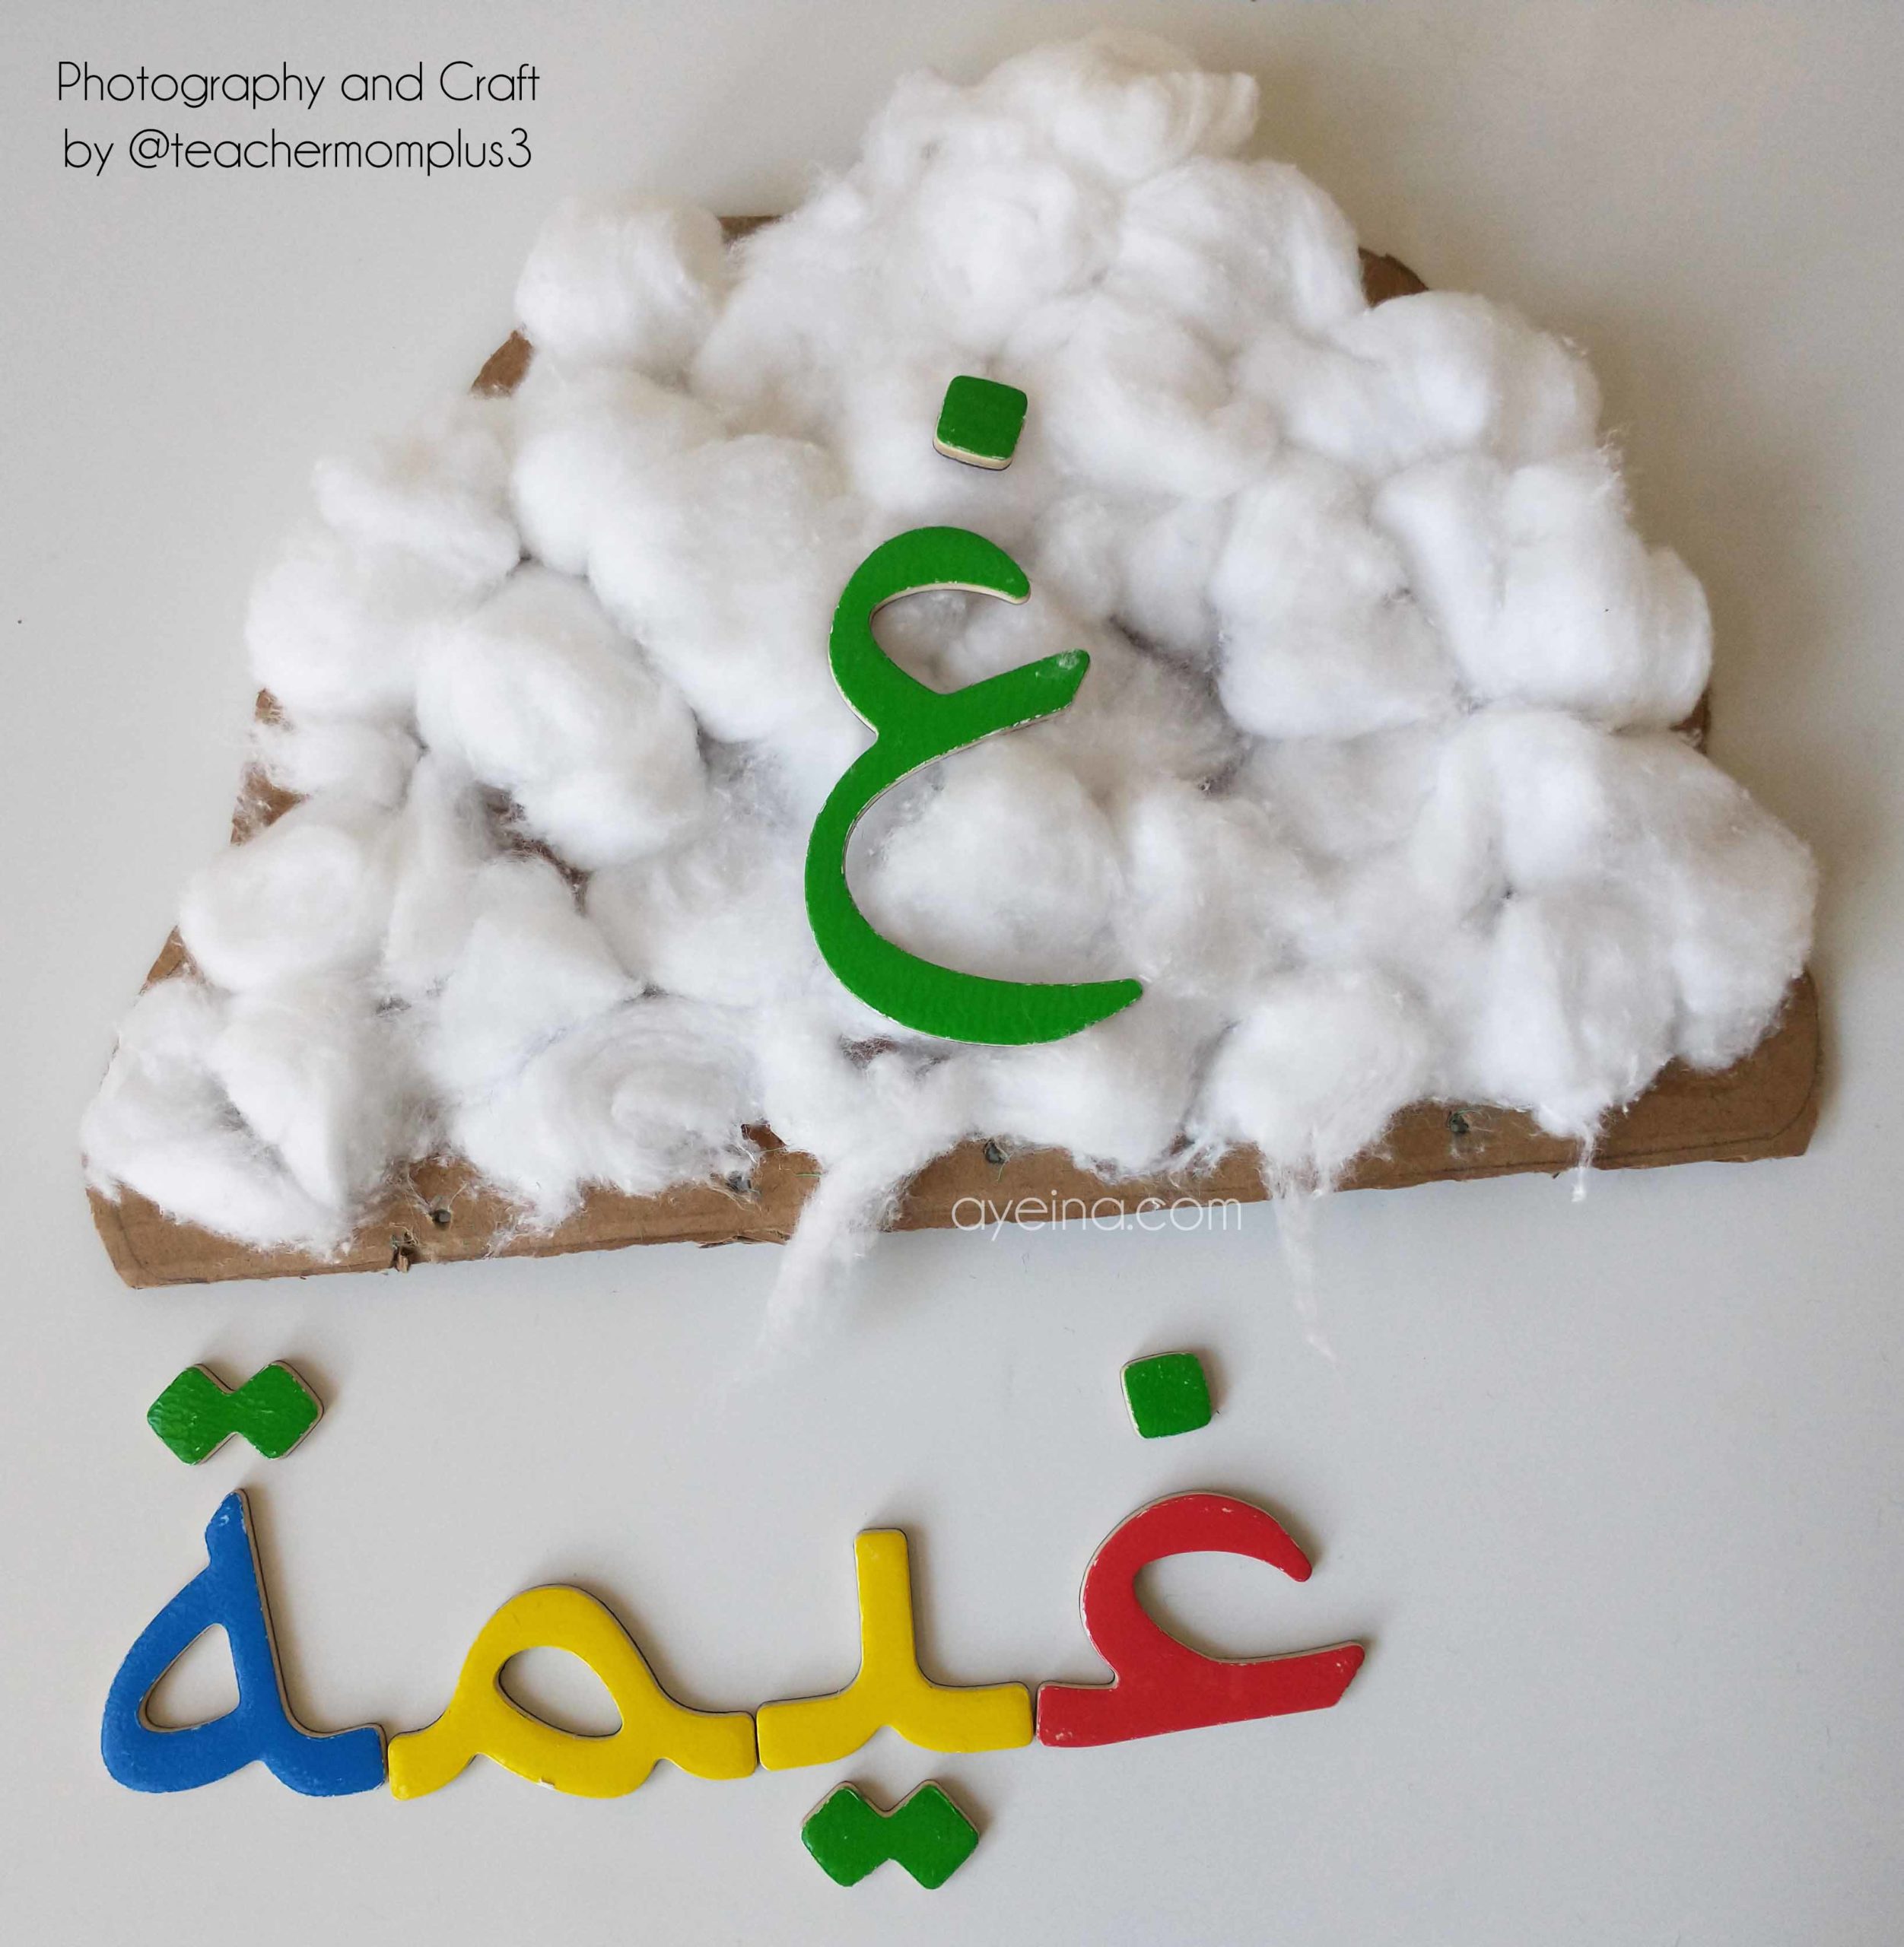
19) Ghaeen (غيمة = غ – Cloud)
@teachermomplus3 made a craft for the letter ghaeen.
Materials needed for the craft: Cardboard, Cotton balls, Glue.
What to do: Draw the shape of a cloud on a piece of cardboard. Cut it out. Spread some glue and add the cotton balls.
20) Faa (فراشة = ف – Butterfly)
@acraftyarab made a craft for the letter faa.
Materials needed for the craft: Recycled cardboard box, two different colors of recycled tissue paper, fa letter print out, scissors, glue.
What to do: Today we will look around the house to reuse/reduce/recycle things around us. Print out your favorite Arabic letter & cut it out. Then you will need to glue it down inside your recycled box. Cut out a rectangle, around the letter, from the recycled box and also the tissue paper into small rectangles. Crumble up one of the tissue paper colors and glue all the little pieces inside the letter. Crumble up the second tissue paper color and glue it around the letter. Wait for everything to dry and now your letter is complete to add to a shelf, pin to a wall, or place inside a shadow frame.
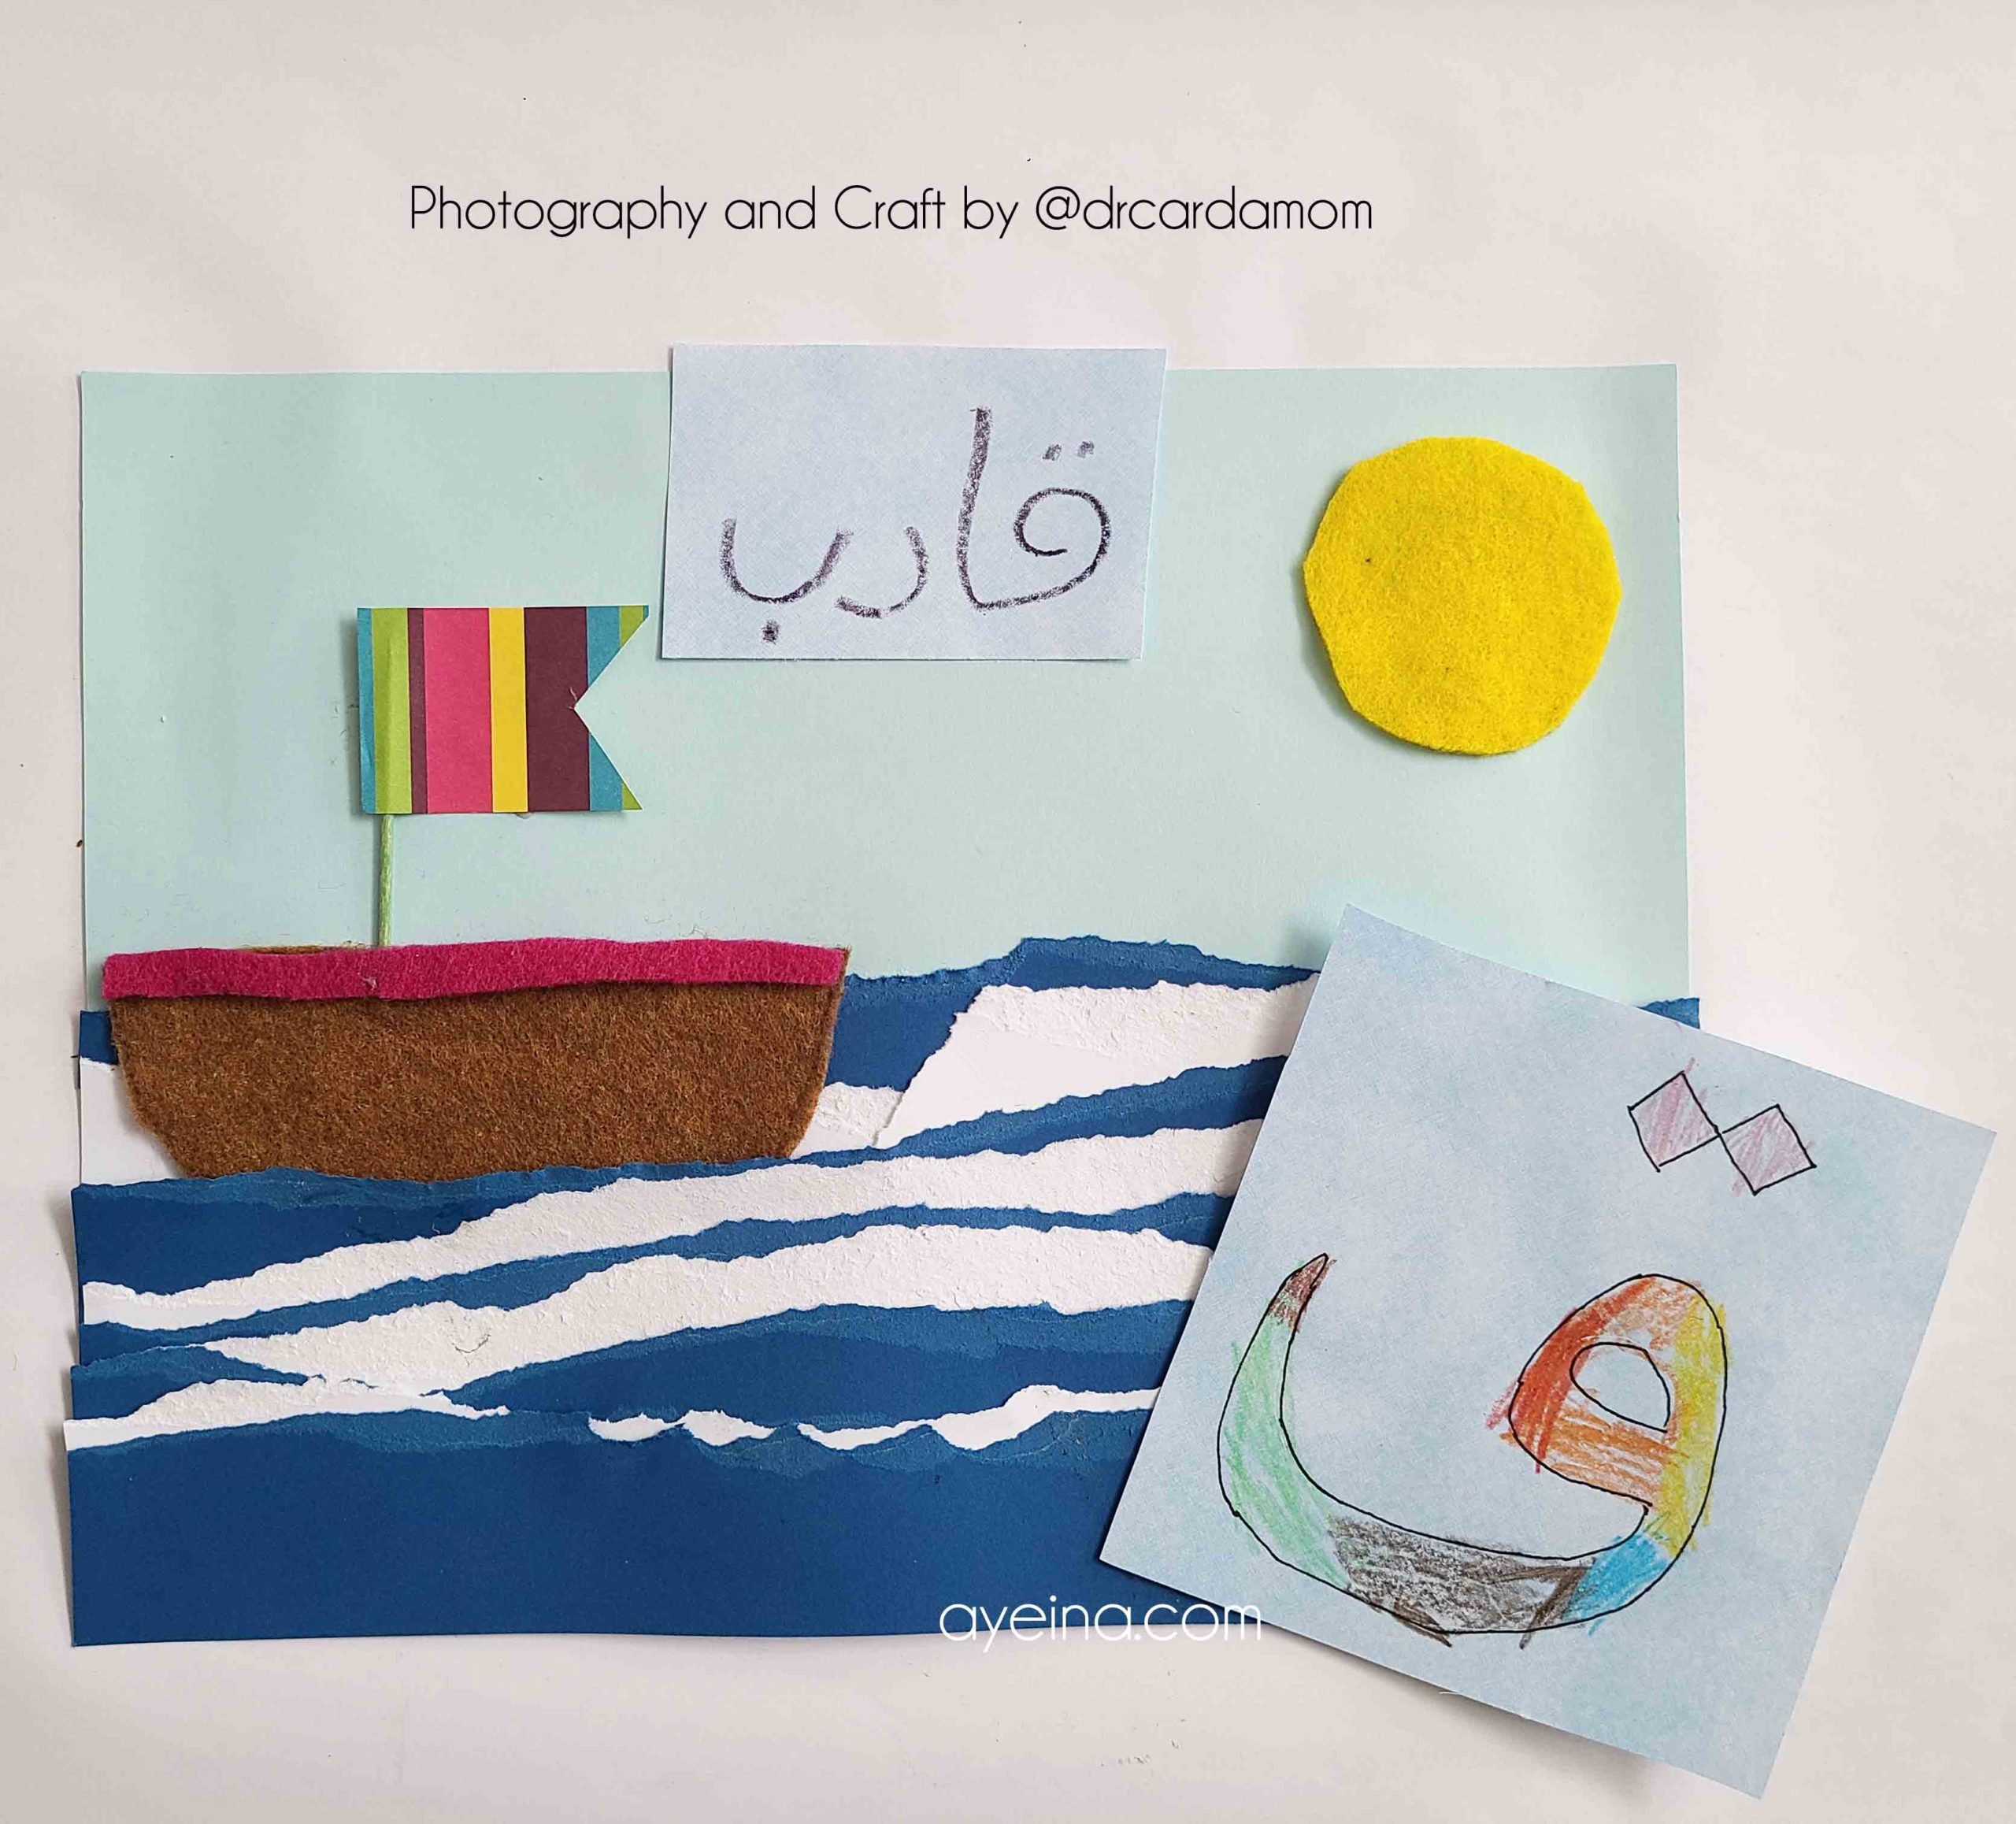
21) Qaaf (قارب = ق – Boat)
@drcardamom made a craft for the letter qaaf.
Materials needed for the craft: Blue and white craft paper, Brown and yellow felt material, Additional paper and material to make flag and decorate boat, Wooden toothpick, Scissors, Gluestick, Printout of letter Qaf.
What to do: Tear blue and white paper into strips and layer to make waves; glue in place. First, you will cut out a boat with felt and glue between layers of blue and white. Then cut out a sail and glue sail onto toothpick which us tucked into boat. After that, cut out felt sun and glue in place. Color printout of Qaf.
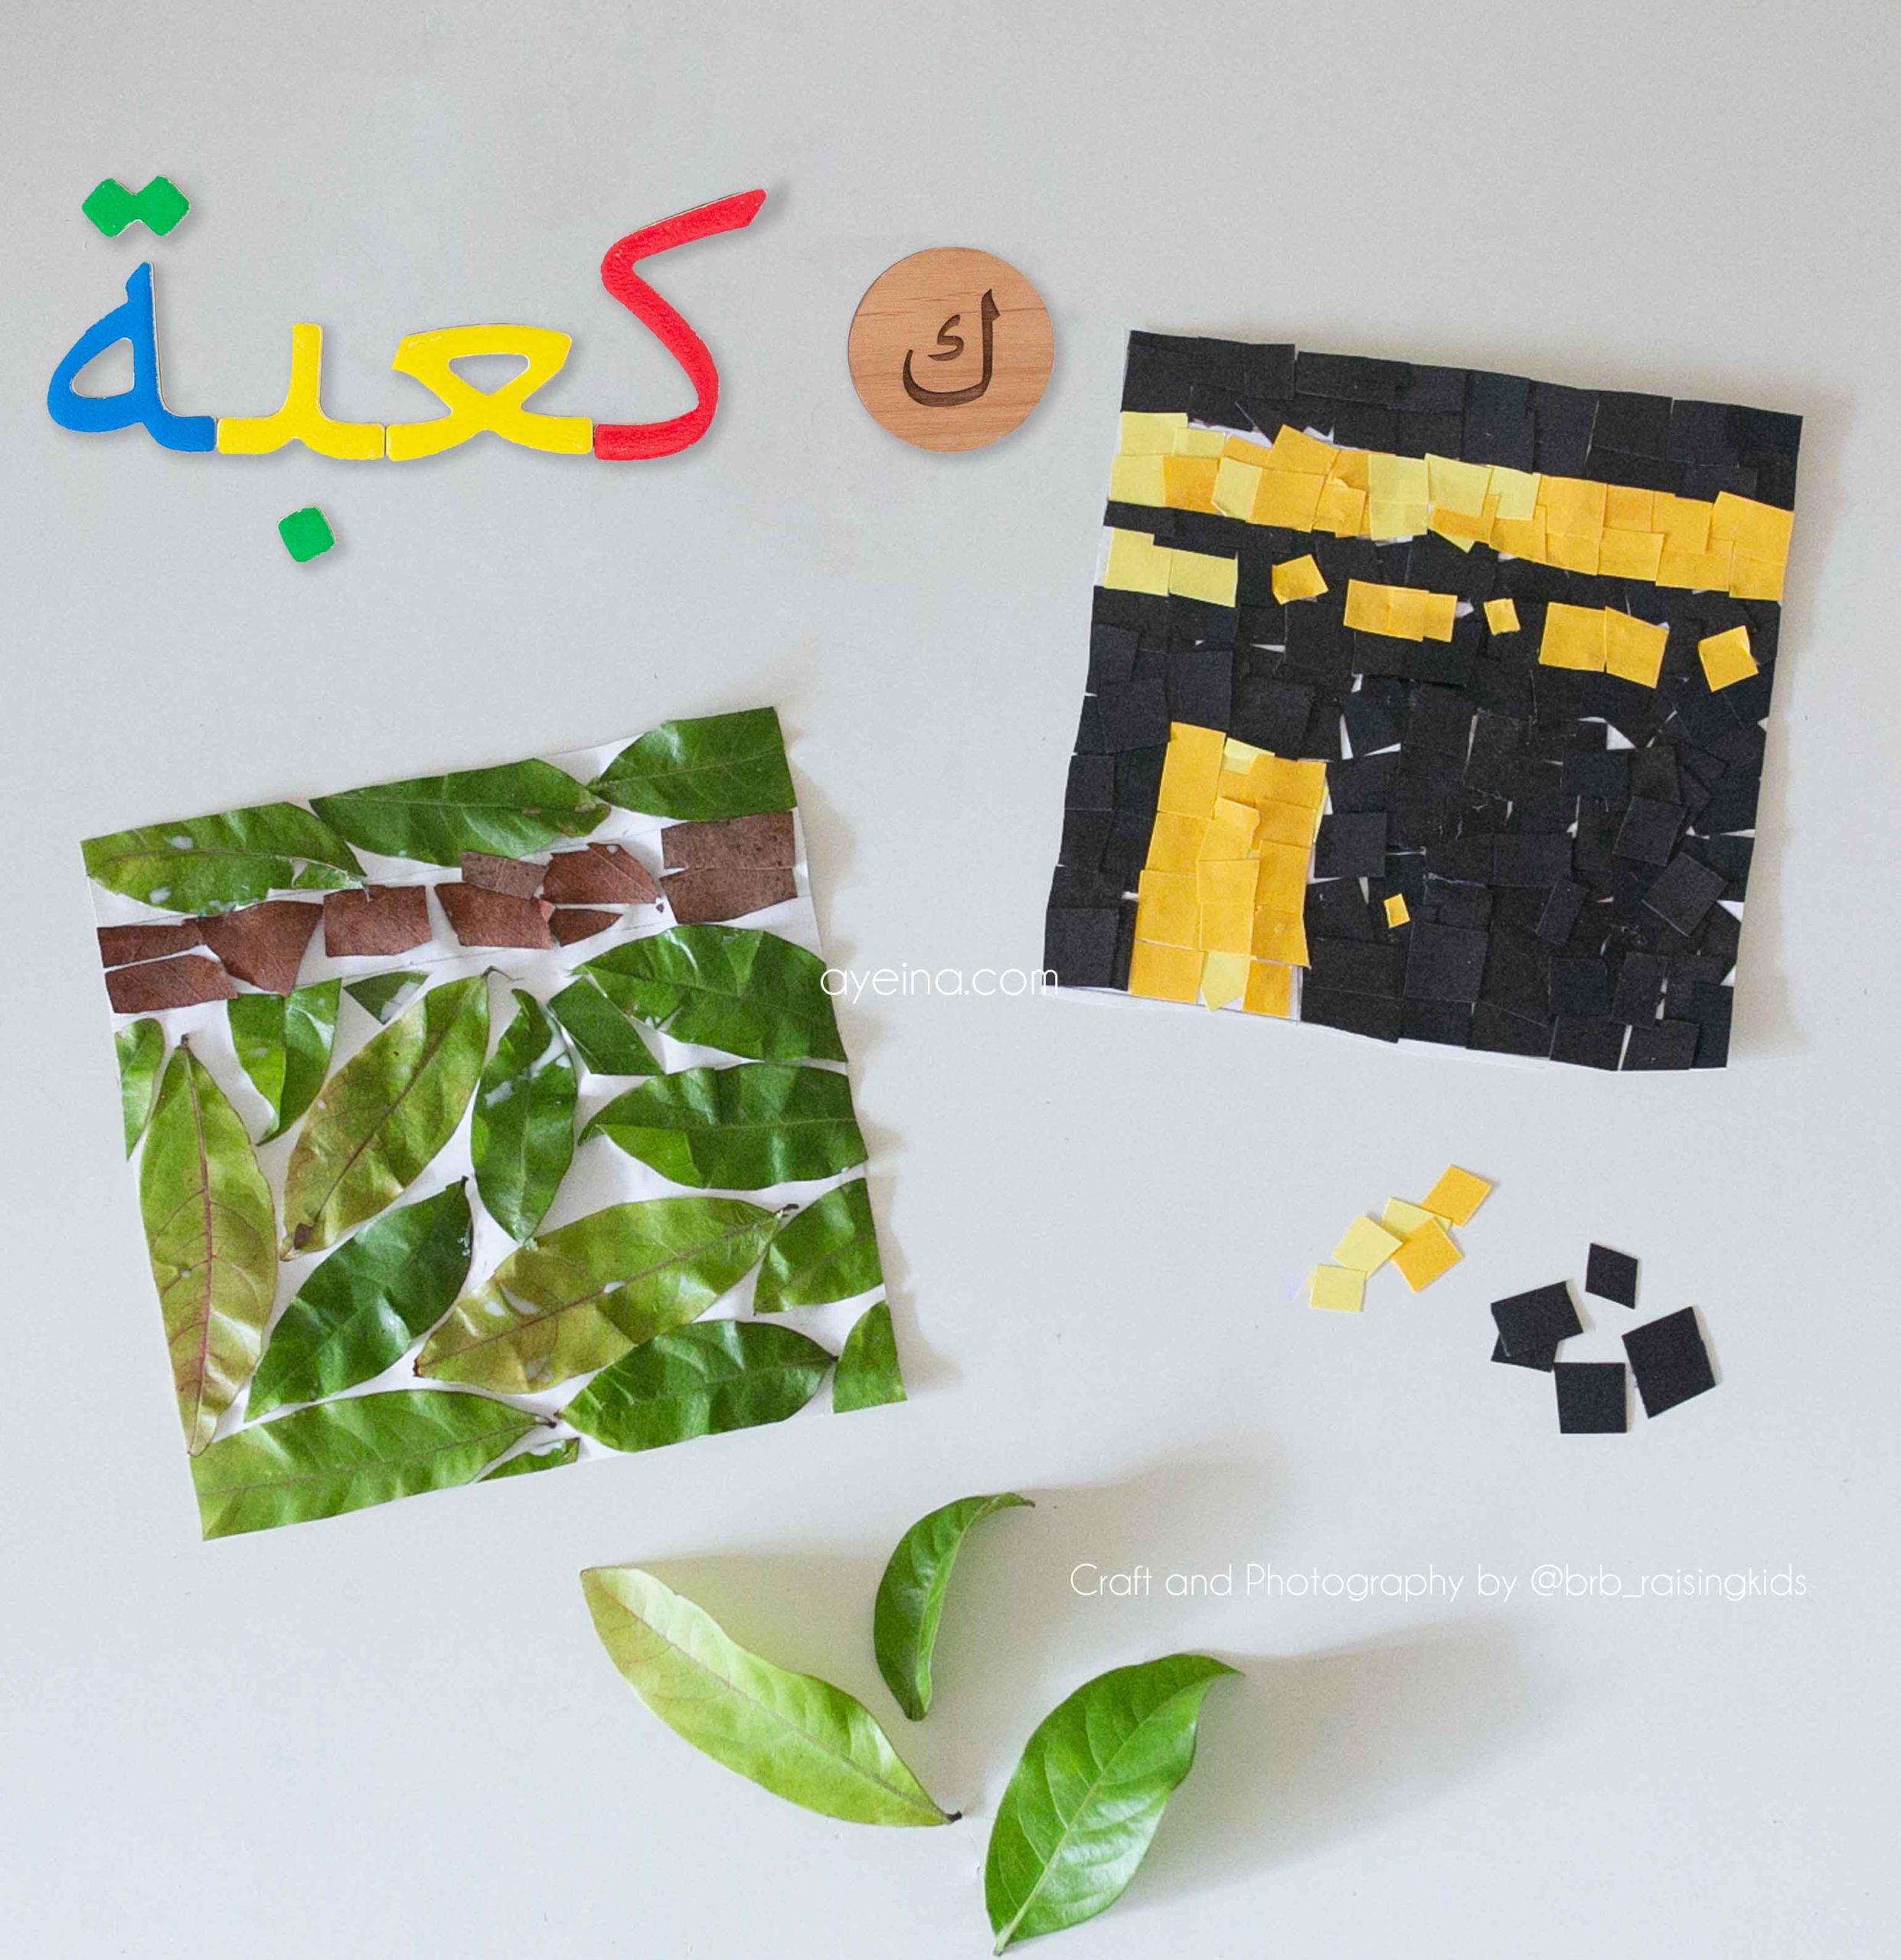
22) Kaaf (كعبة = ك – House of Allah)
@brb_raisingkids made a craft for the letter kaaf.
Materials needed for the craft: Leaves, Bark, Paper (White, Black and Yellow), Scissor, Glue.
What to do: Draw 2 square shapes on the white paper. Glue the leaves, bark and other coloured paper onto these squares. Cut around the squares.
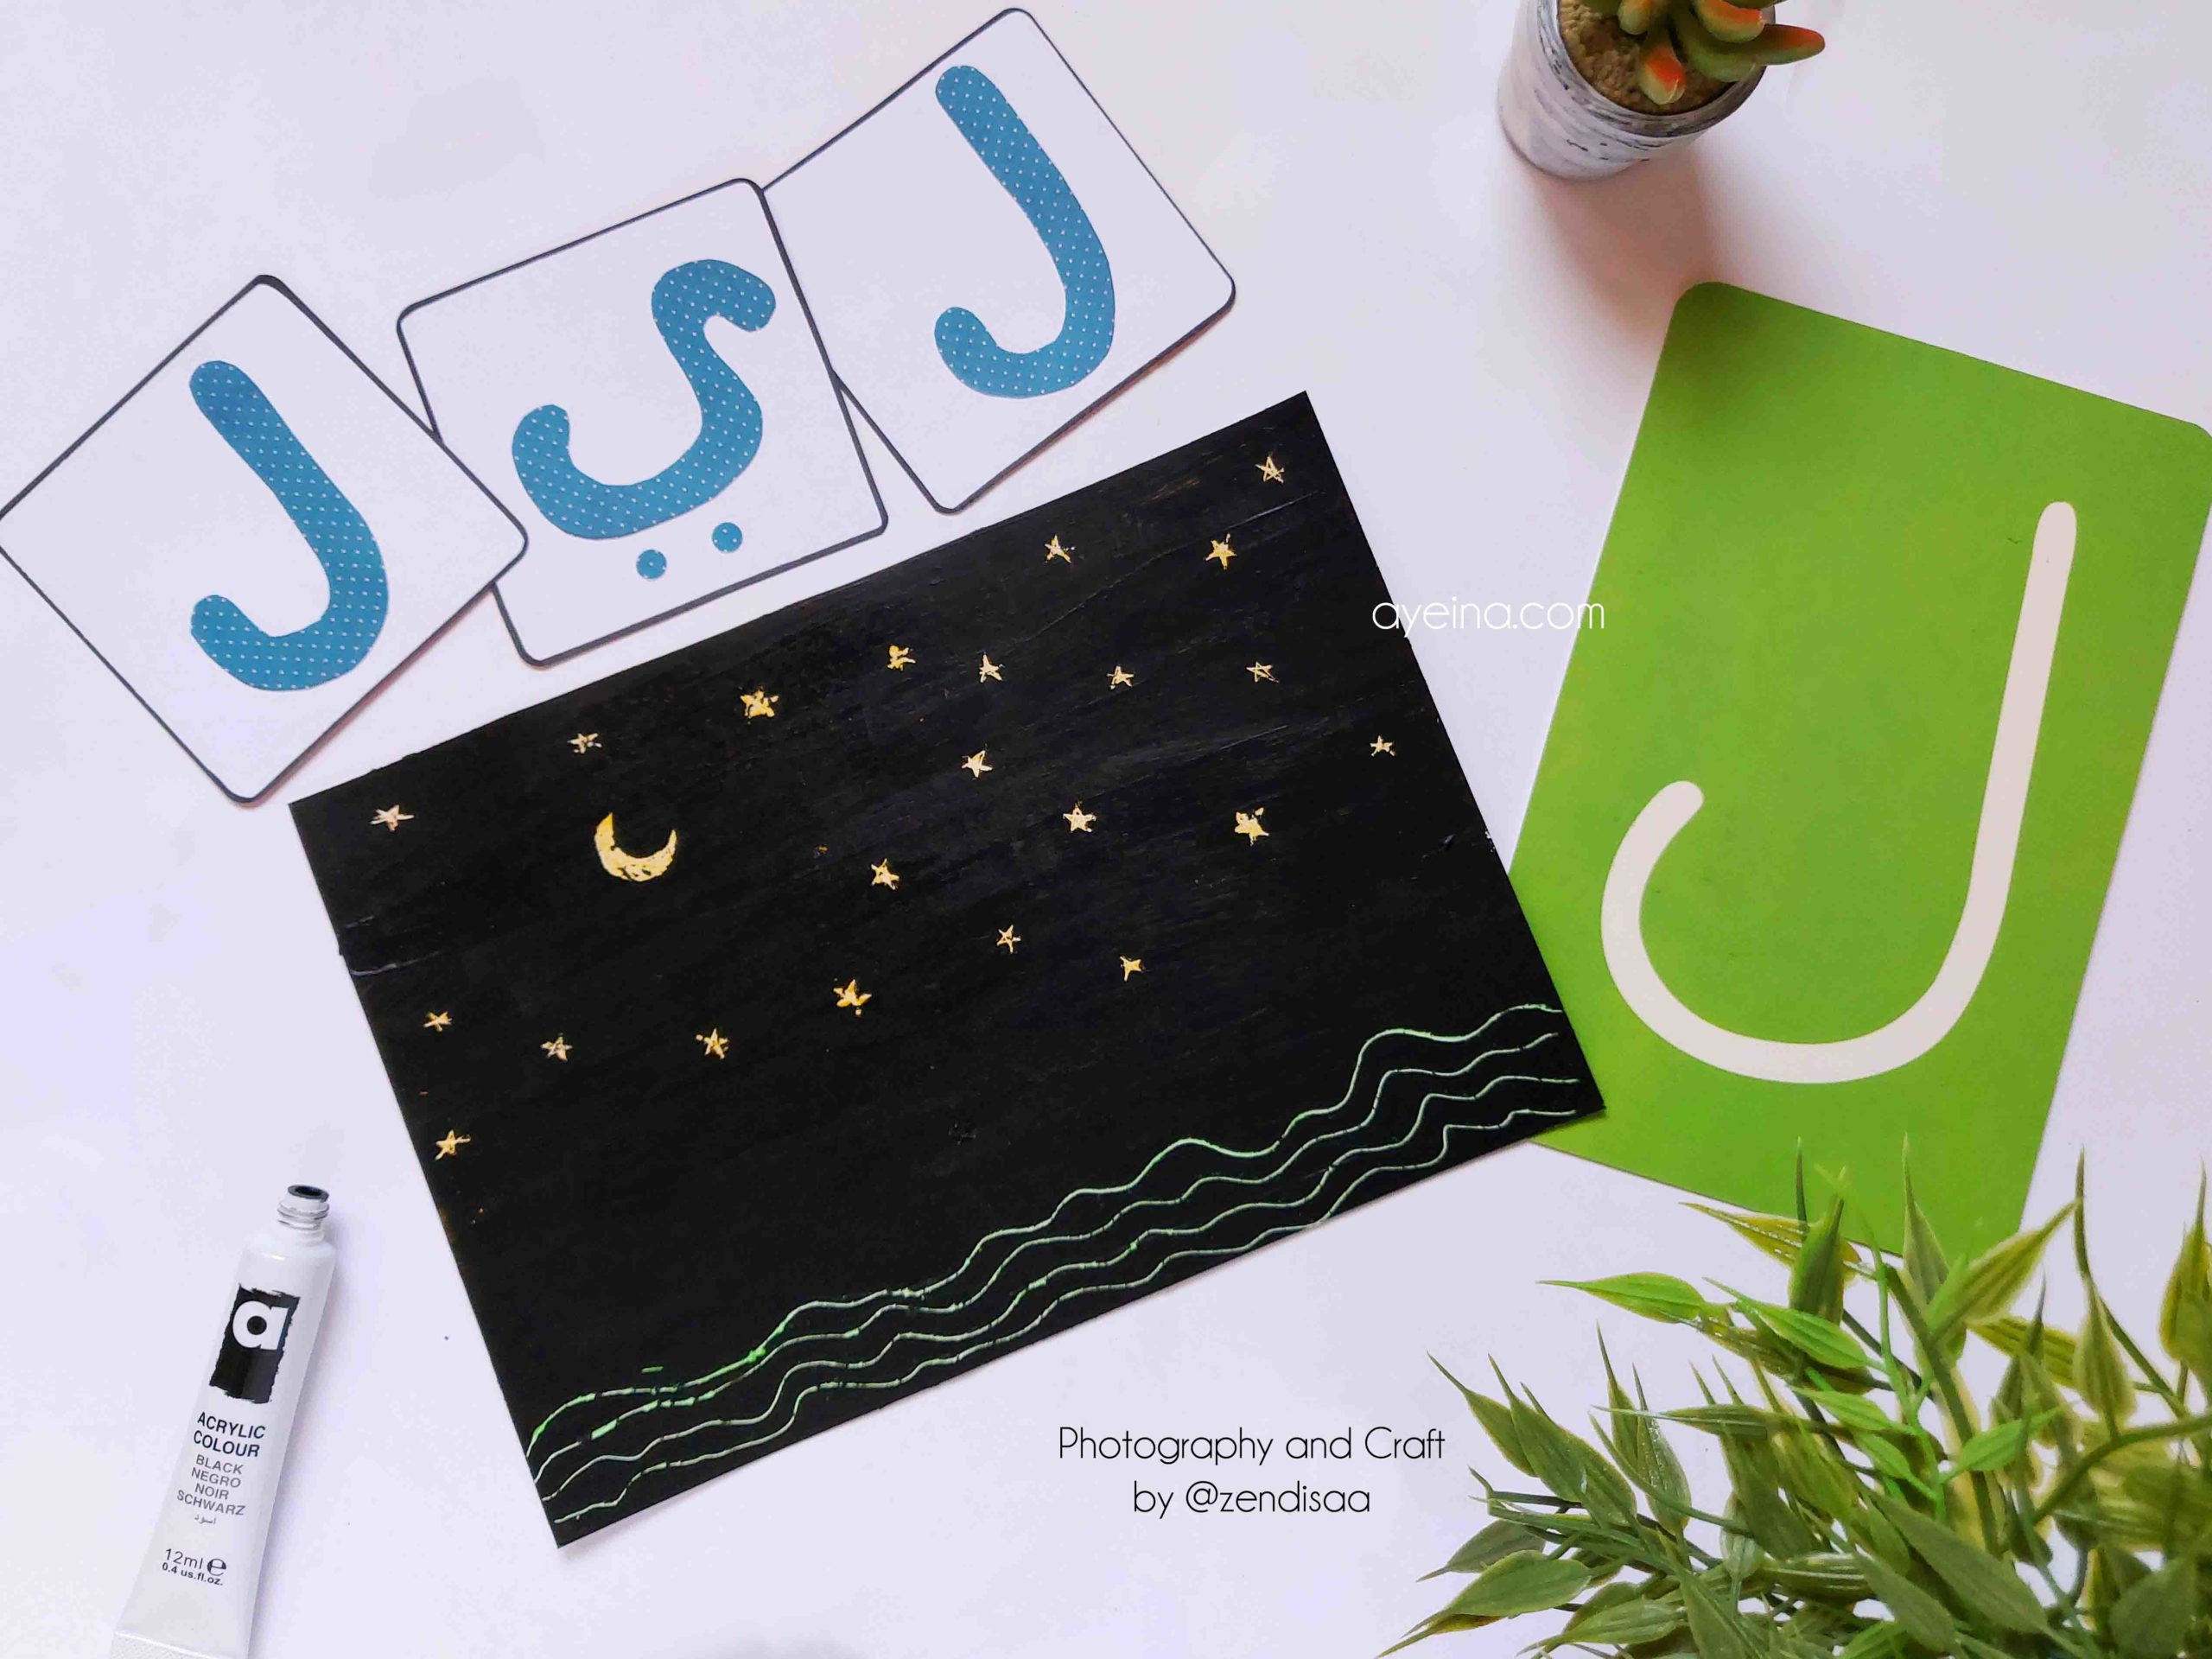
23) Laam (ليل = ل – Night)
@zendisaa made a craft for the letter laam. DIY Scratch Paper for the letter Lam, and the word Layl.
Materials needed for the craft: Thick paper (cardstock or watercolor paper), Yellow and green wax crayon, Paintbrush, Black acrylic paint, 2 to 3 drops of dishwashing soap, Toothpick.
What to do: Take the yellow crayon and color the top 3/4 of the cardstock. This part is for the moon and stars. Make sure to color in thick and without leaving any white space. Use the green crayon and do the same for the bottom 1/4 of the card. This is the hills/land. Mix 2-3 drops of dishwashing soap with a decent blob of black acrylic paint. Mix well. Paint over the whole card, over all the crayon-colored area. The whole card should be black. Let to dry. (On the flip side of the card make a note of what is the yellow area and green area). Once it is fully dried, using a toothpick draw a moon and some stars on the sky and mountains/grass on the land and we’re done.
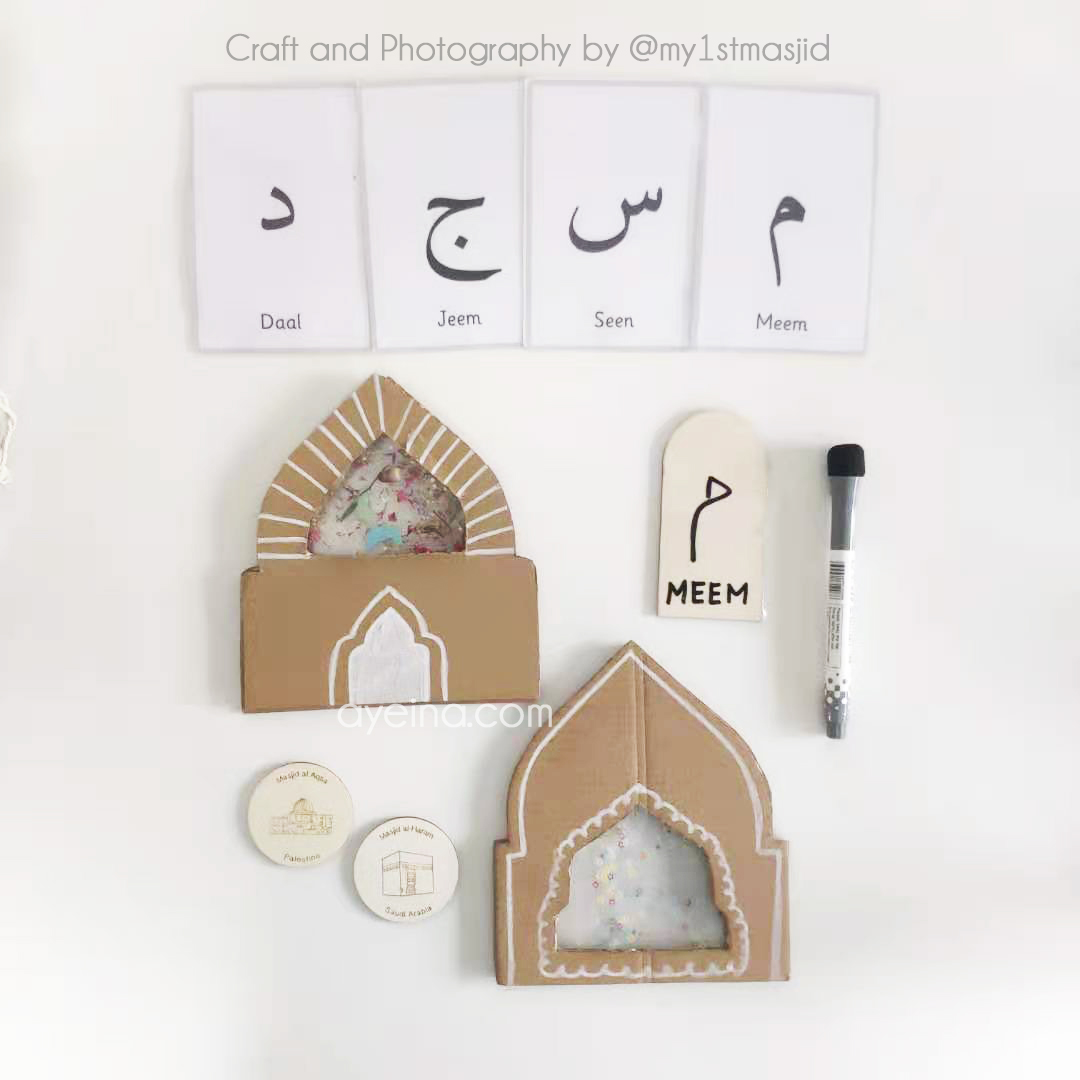
24) Meem (مسجد = م – Mosque)
@my1stmasjid made a craft for the letter meem.
Materials needed for the craft: Cardboard, plastic sheet, sequins/beads/glitter/crushed dried flowers or leaves, glue, marker.
What to do: Choose your preferred shape. Trace shape onto cardboard x 3. These pieces are your layers. If you want more room in your shaker for bigger beads or dried flowers that need room to move, cut 4 pieces/layers. The inner cut-out shapes are your windows where the glitter will show, and be in between. Use a plastic sheet for your window, you can use a spare laminating sheet for this part. Cut a plastic sheet, enough to fit your window. You need 2 of these to go on the outer layers of your shaker. Stick the 2 plastic sheets onto 2 cardboard pieces you cut out earlier. Make sure the glue parts go on the inside of your shaker so you can’t see any messy edges when you’re done. You should have 1 piece of cardboard cut out left, this piece does not need a plastic sheet stuck on. Stick this remaining cardboard piece on top of one of the plastic window parts like a sandwich. Be sure to glue right close to the edges, use a glue gun so the glitter/beads cannot escape. Now you have some space for your glitter, pour in as much glitter or sequins as you have. The more the merrier, but of course leave some room for them to shake! Add your top plastic layer, remember to glue all the way around as close to the edge so your glitter can’t escape.
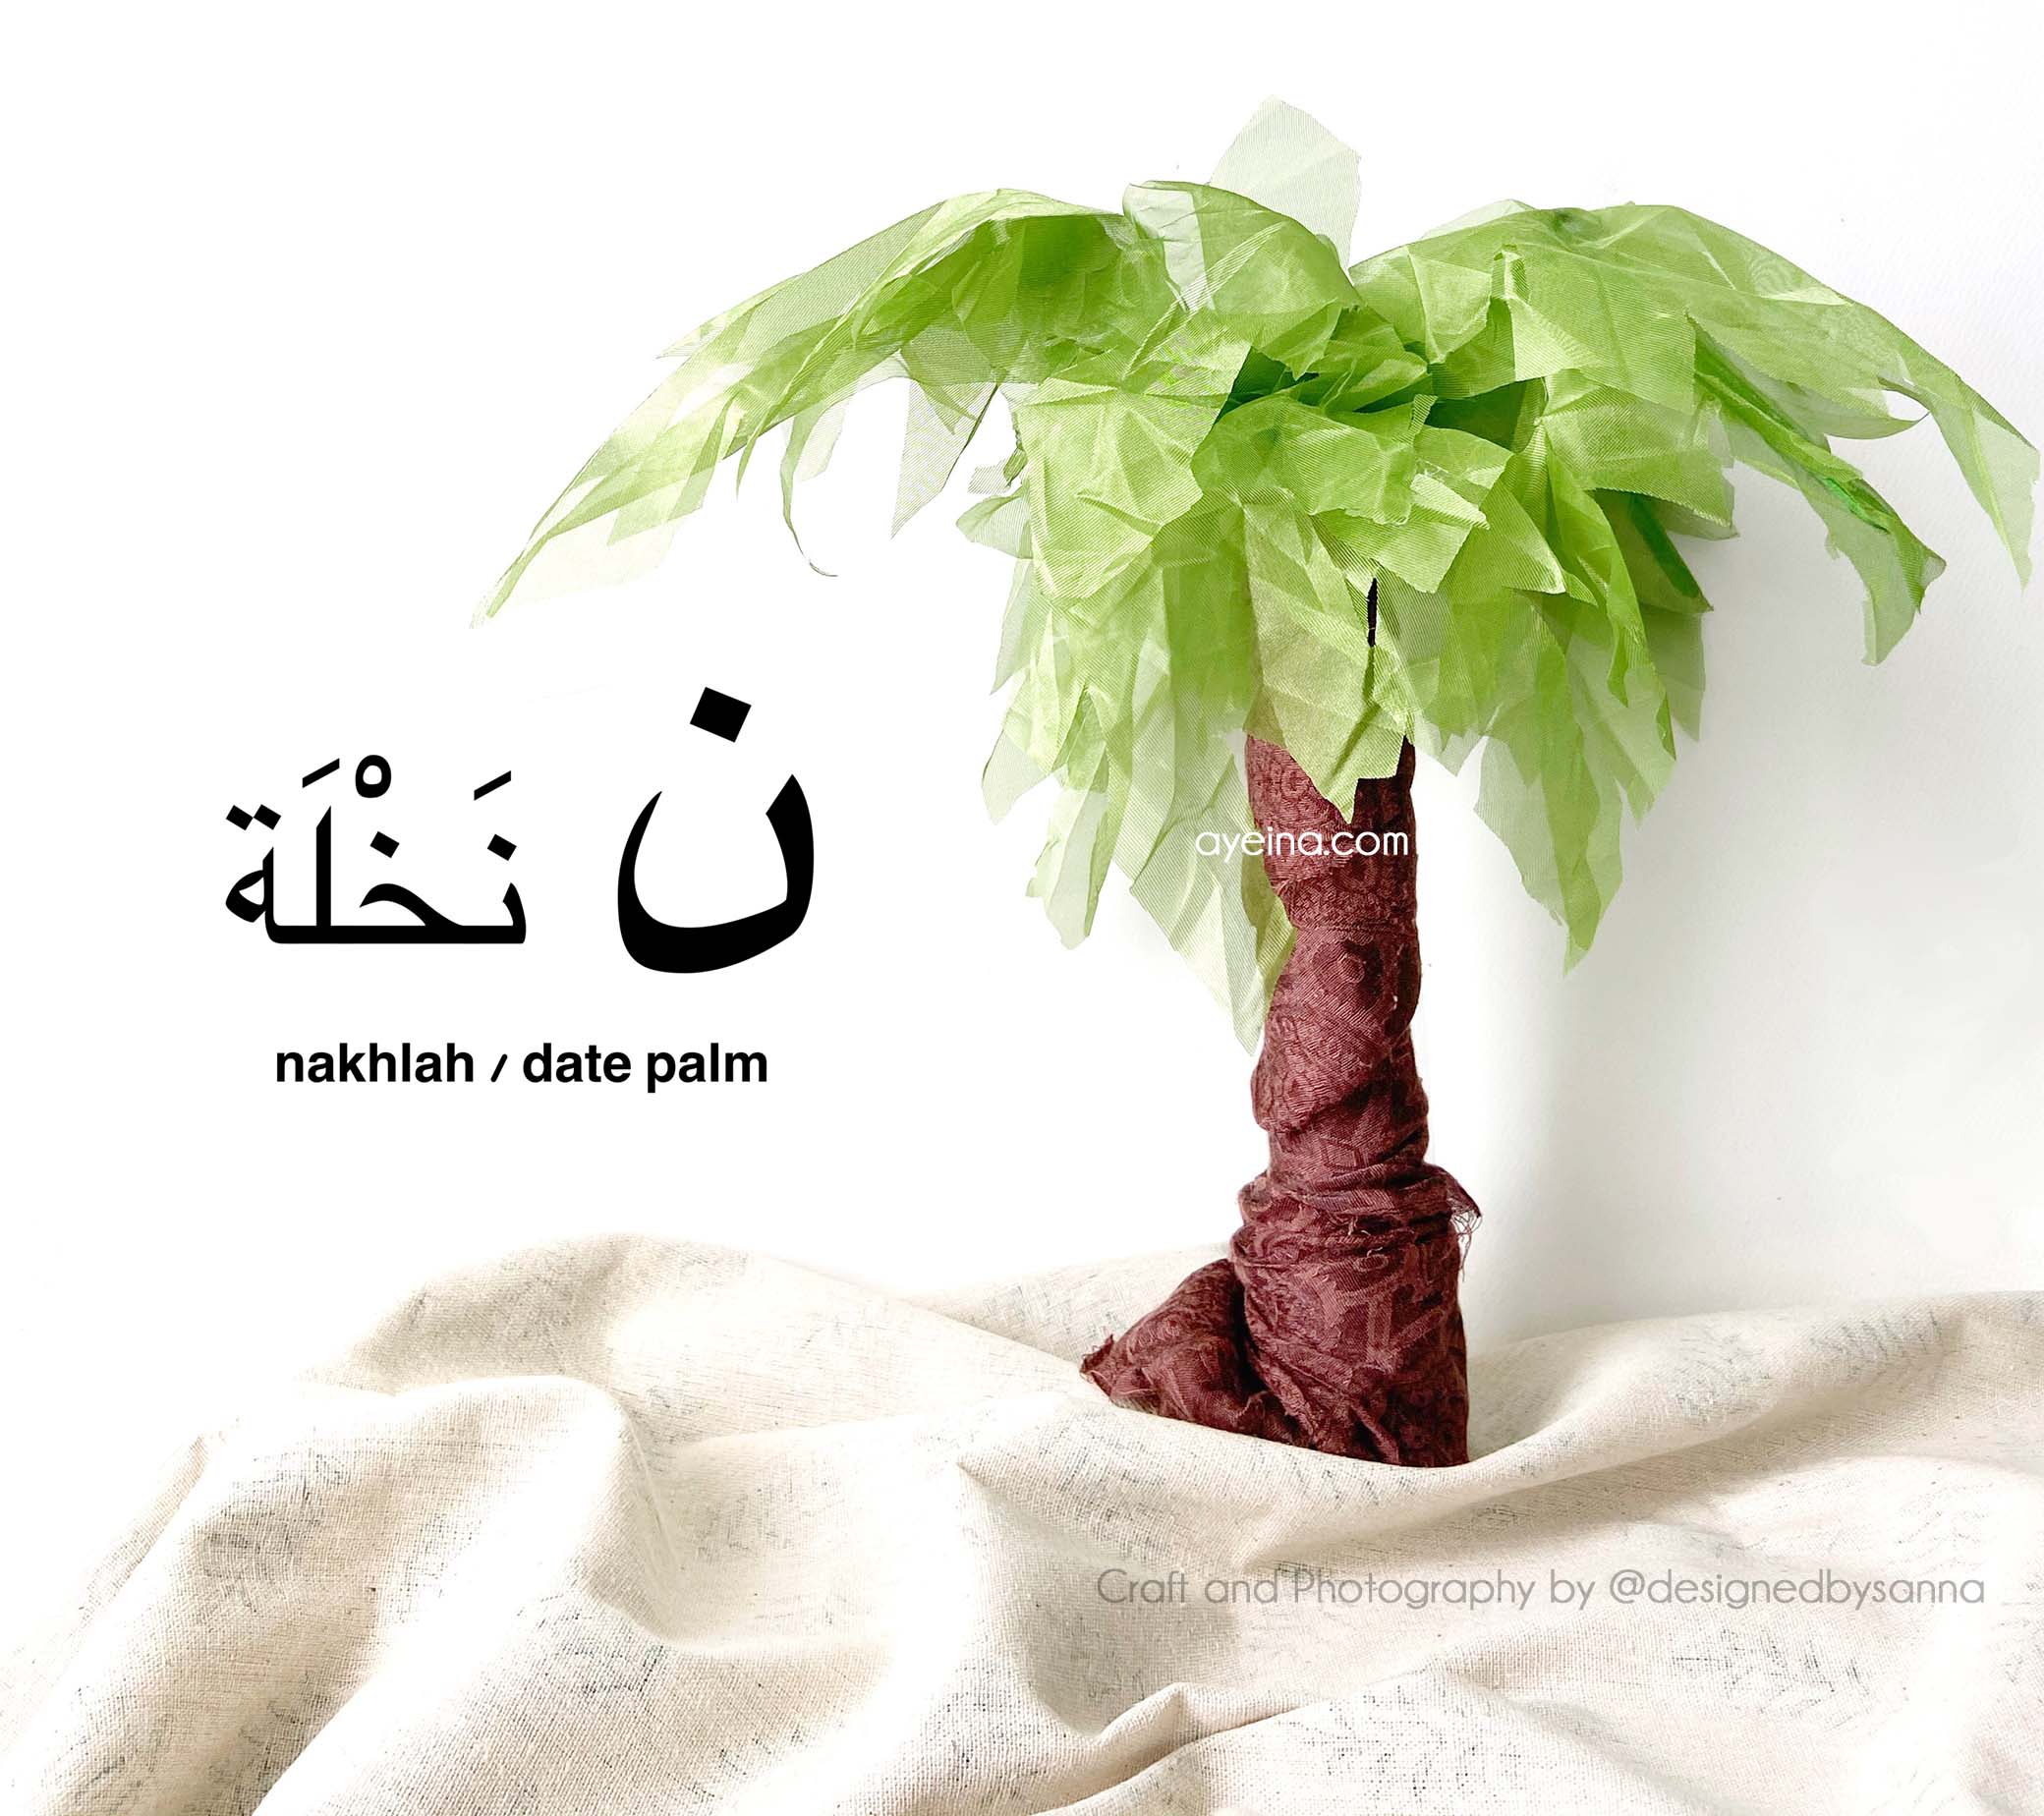
25) Noon (نخلة = ن – Date-Palm Tree)
@designedbysanna made a craft for the letter noon.
Materials needed for the craft: long cardboard paper roll, green fabric (organza or tulle), brown fabric, green popsicle sticks, hot glue gun + sticks, scissors.
What to do: Cut green fabric into different sized leaf shapes. You can fold fabric to do multiples at a time. Create slits and notches around the leaf in a similar angle. Use popsicle sticks on the back of the to add structure to 3 larger leaves. You can partially snap the popsicle sticks to create a curved effect. Roughly wrap brown fabric around the cardboard roll using a hot glue gun. Crease fabric as you go to imitate the palm tree trunk texture. Attach the leaves with popsicle structure to the top of the trunk. Use remaining smaller leaves at the top centre and between the big leaves.
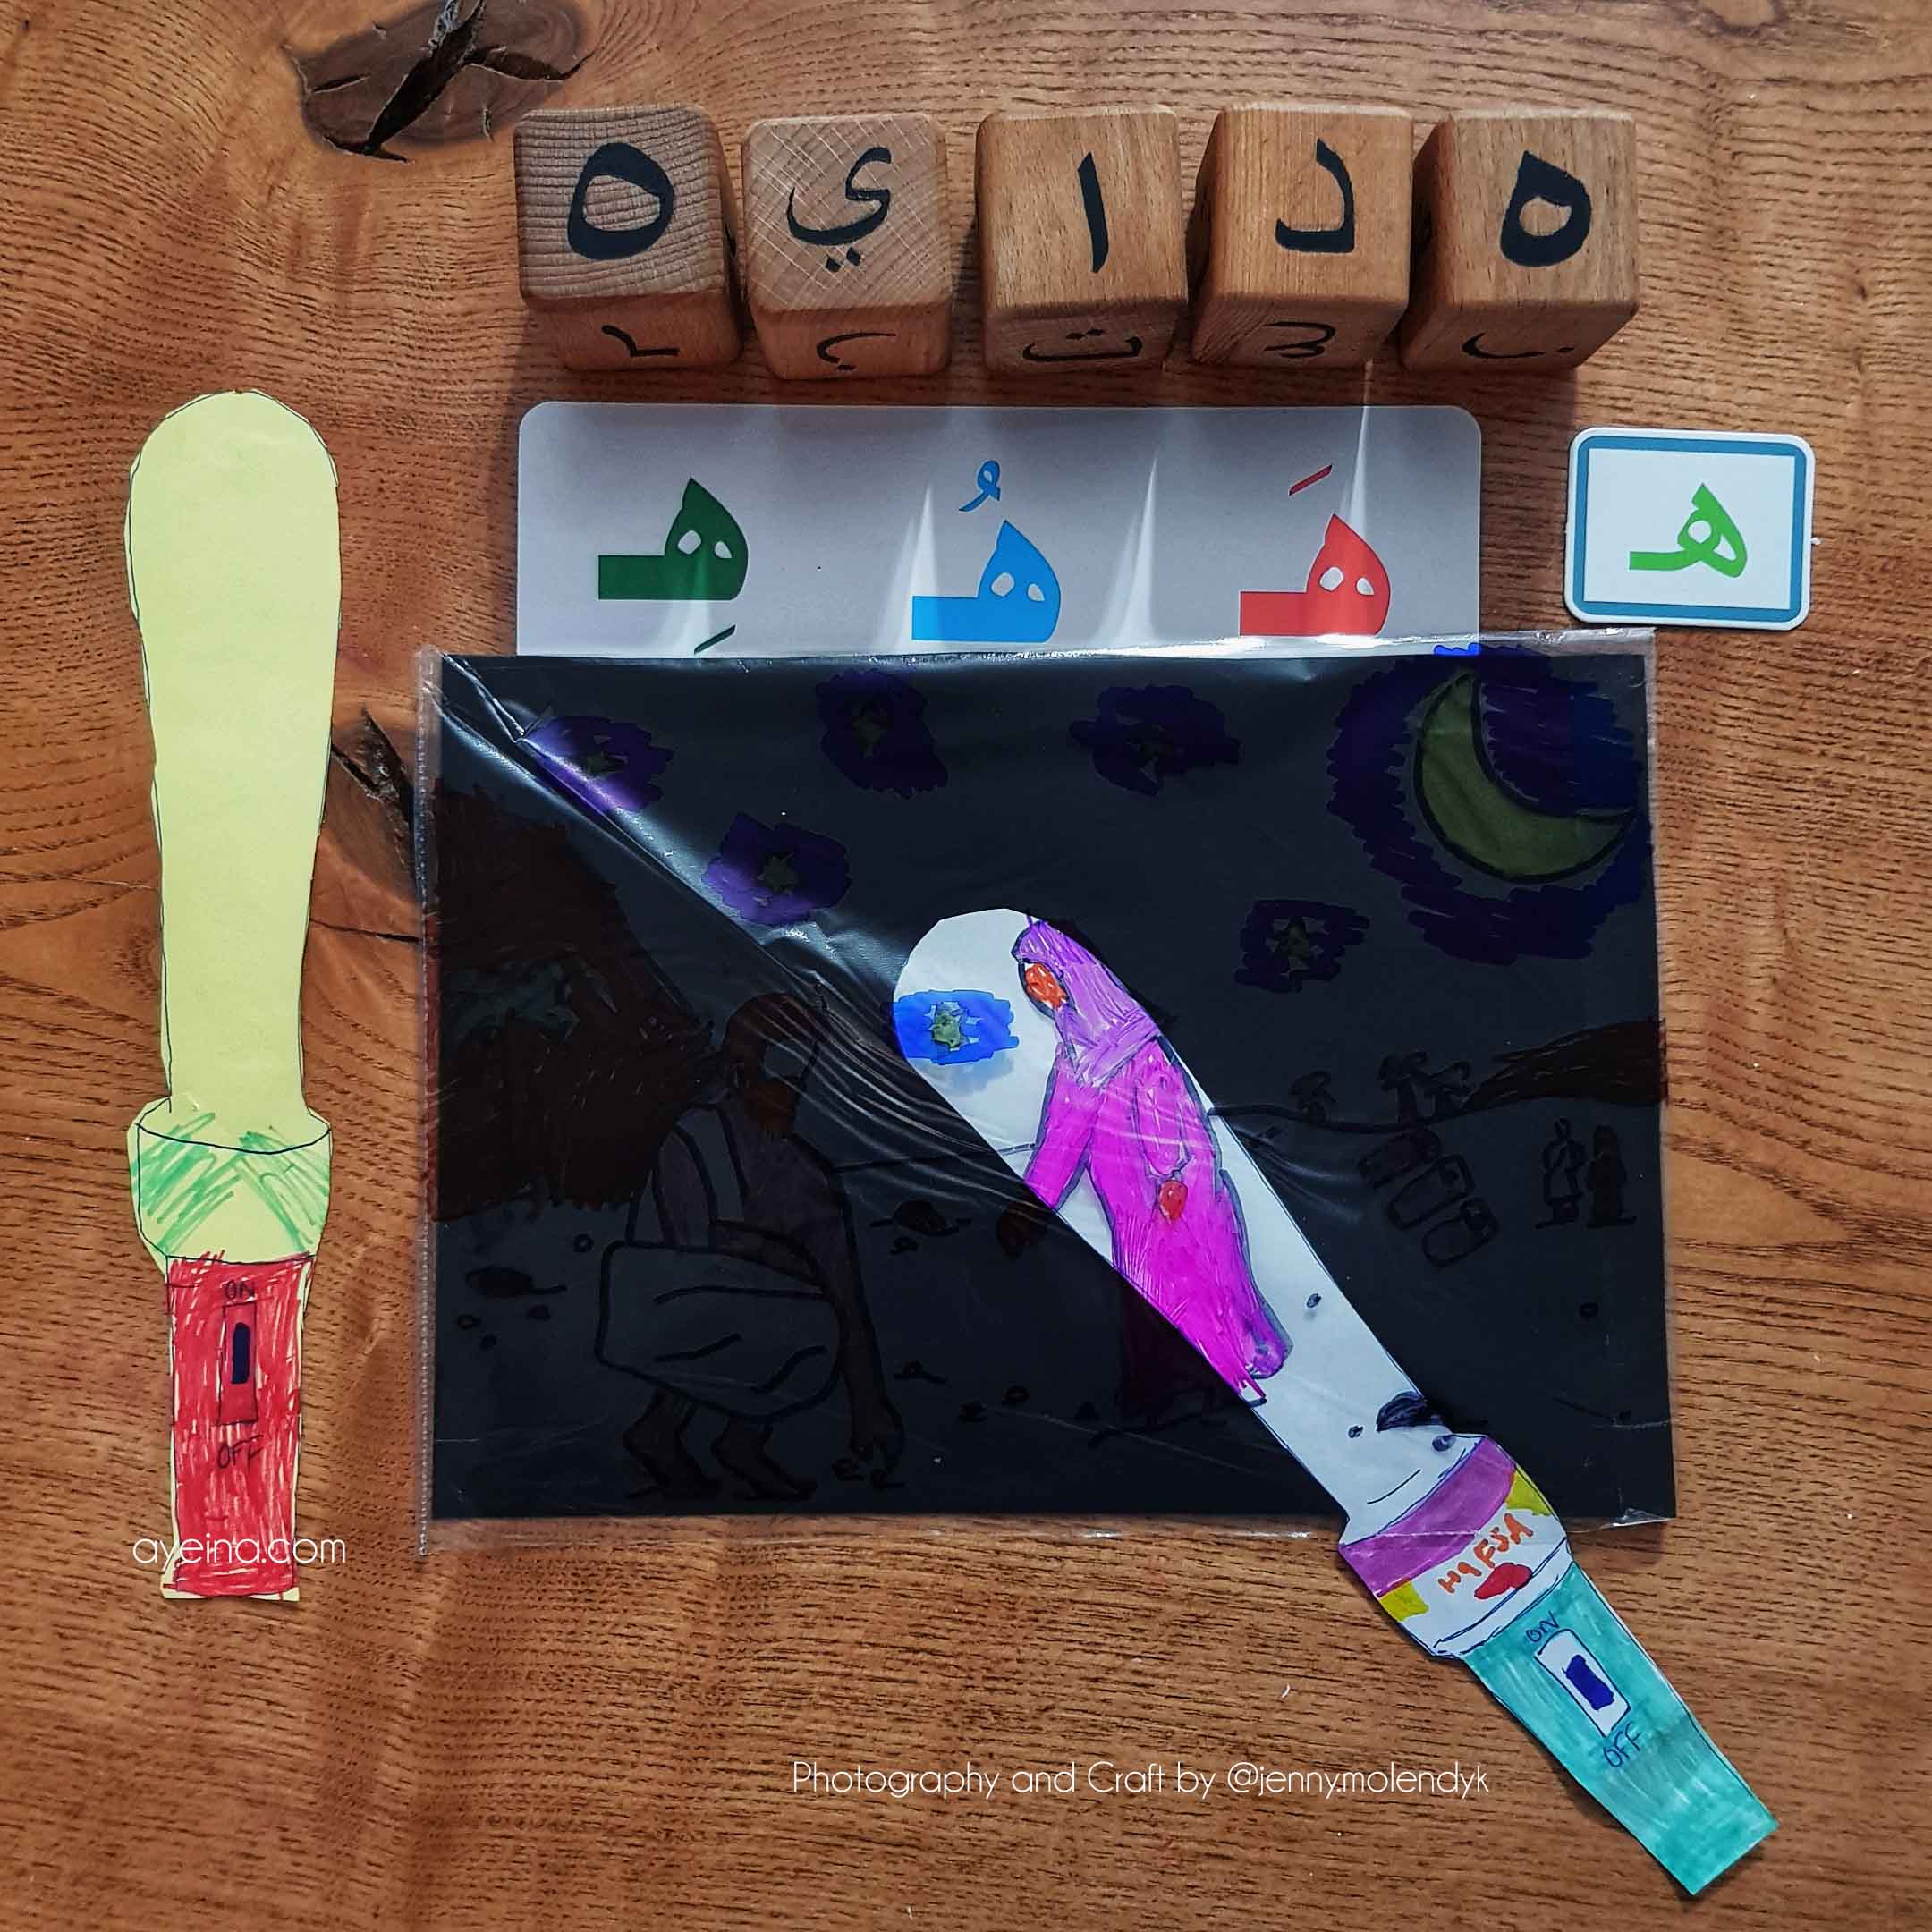
26) Haa (هداية = ه – Guidance)
@jenny.molendyk made a craft for the letter haa. Hidayah is typicall translated as guidance, and for Muslims we often associate this guidance with the Quran. There are multiple verses in the Quran where Allah talks about leading people out of darkness and into the light. He it is Who sends blessings on you, as do His angels, that He may bring you out from the depths of Darkness into Light: and He is Full of Mercy to the Believers – 33:43. This craft is a fun way of using “light” to reveal a hidden image. We drew a scene from Hajj, pilgrims in Muzdalifah, but really you could draw any picture you wanted.
Materials needed for the craft: A plastic page, A piece of black paper, Permanent Markers, Scissors, tape, A piece of white or yellow cardstock (paper is also ok).
What to do: To begin, use permanent markers and draw a picture onto the plastic page (this works best if you draw the picture in a landscape layout (keeping the long side at the bottom)). If you want you can first draw your picture on a plain piece of paper and then trace it onto the plastic page. When you are done tape up the open side of the plastic page. Now carefully cut off the bottom of the plastic page (so one of the long sides is now open). On your white/yellow piece of cardstock draw a flashlight with a light beam. Colour in the flashlight but leave the light beam untouched. Now slide you flashlight beam into the plastic page on top of the black paper. As you move the flashlight, you should see your image appear in the “light”.
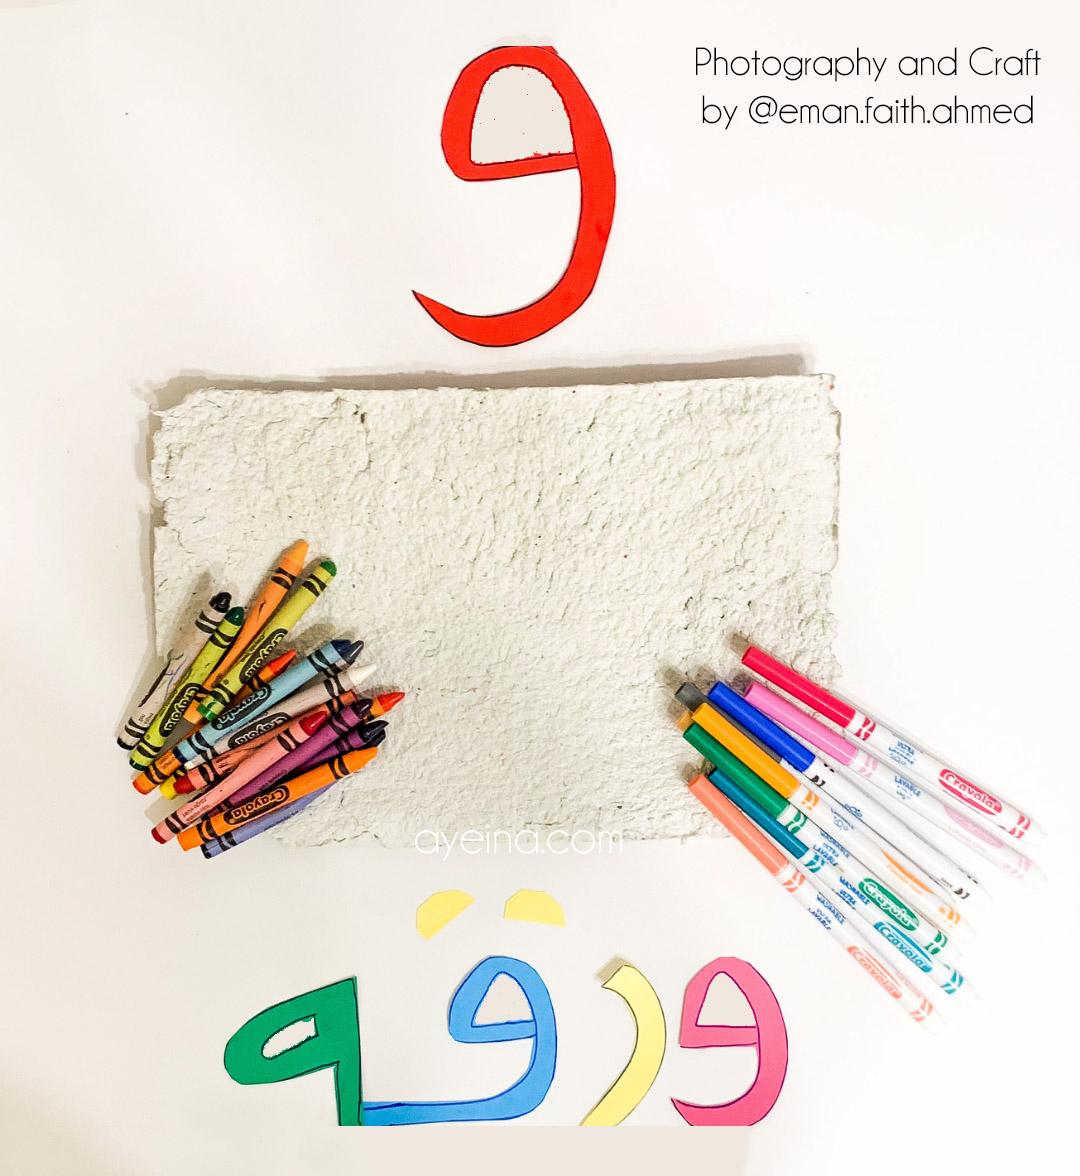
27) Wow (ورقة = و – Paper/Sheet)
@eman.faith.ahmed made a craft (DIY eco-friendly recycled paper) for the letter wow.
Materials needed for the craft: Scrap paper, blender, strainer/screen print sheet, sponge,
What to do: Grab some scrap paper. Colouring books and old homework sheets work great! Cut them up or rip them up into small pieces. The kids tend to enjoy this part. It is great stress relief! Soak the pieces of paper in water overnight or for a few hours. Add them to a blender with some water and blend until it turns into a pulp. Strain the pulp and gently pat to spread it across the strainer or screen print sheet, Use a sponge to gently soak up excess water. Allow it to dry overnight. You can press the sheet with an iron to make it crisp or use it as is if you enjoy the texture.
28) Yaa (يمين / يسار = ي – Right/Left)
@she_lives_her_life made a craft for the letter yaa.
Materials needed for the craft: Coloured card, Glue, Scissors, Hadith strips, Marker to decorate the front cover.
What to do: Cut out 10 butterfly shapes from the different coloured cards. Fold in half and stick the halves together, back to back, so that they open up into a book. Carefully stick the hadith strips on the centre of each butterfly page to make a 10 page Hadith book.

If you end up making any craft out of these, please do share it with us and tag us on social media channels (Instagram or Facebook). Tell us in the comments below which one is your favourite craft?
")
")
")